What about a different approach to our most favourite hobby 3D printing and combining it with a easy and accessible microcontroller and block-based coding to create our own game?
What are you talking about?
I recently discovered the BBC micro:bit, “an award-winning programmable device that allows students to get hands-on with coding and digital making” (quote from their website). The micro:bit is a small microcontroller with a LED matrix, programmable buttons and several sensors and its main use is for educational purposes.
It can be programmed with Microsoft MakeCode, a easy, block-based programming language, that can be used intuitively.
After tinkering around with both tools and learning a bit about each I decided to make something with that new knowledge: Building a Hot Wire game!
To start from scratch we first need some kid of “case” for our Hot Wire game. As I didnt find something online that suits my needs, I decided to combine something I found as a “holder” for my micro:bit and build the rest by myself in Tinkercad.
So here is the micro:bit stand by joojene from thingiverse.com, which already is a remix from BuBizgbs original version.
I gave the model a bit more strength and some cut-outs underneath so three 6x2mm magnets can fit inside. I thought this may be a good solution to have a modular micro:bit stand that can be fixed with magnets on my Hot Wire table.
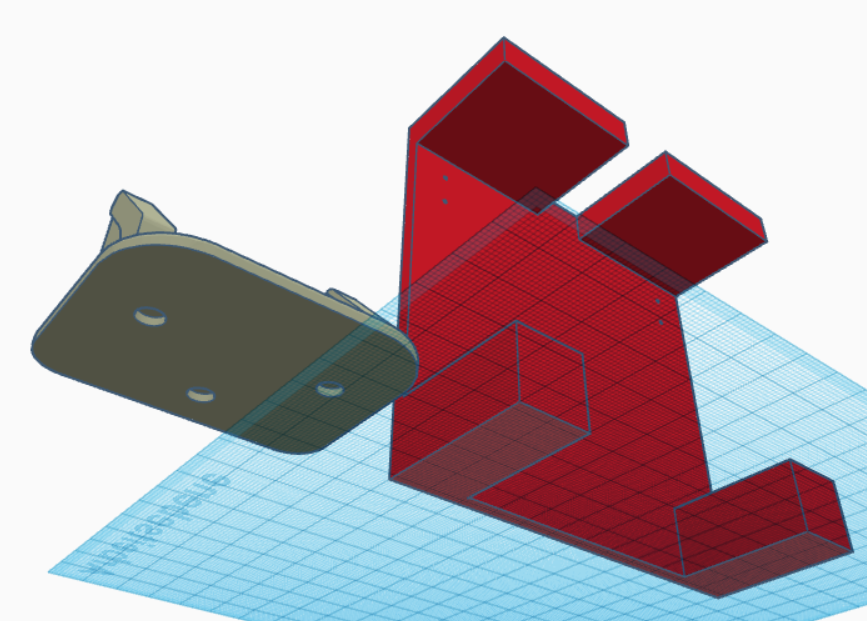
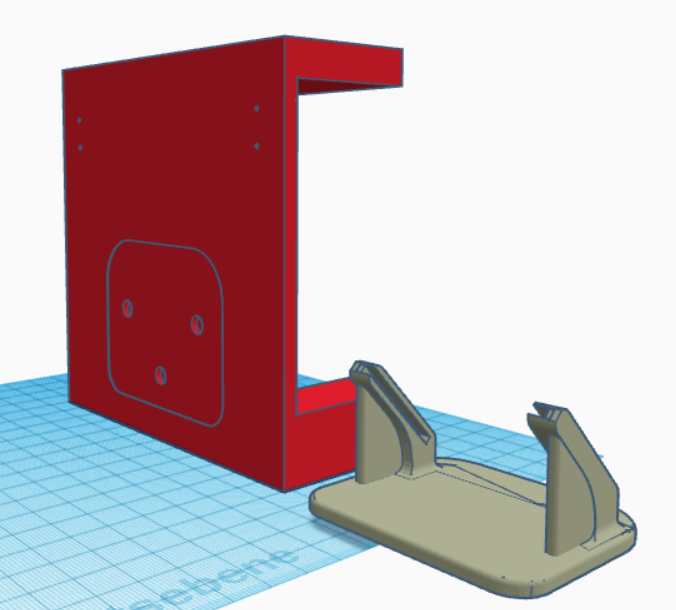
These are the results of my quick 3D tinkering and can be downloaded HERE.
So far, so good! Now lets think about programming. The micro:bit has three pins I can easily use with crocodile clips so it gives me three options for an input signal. One connection for start the game, one for finish the game and one for the “error” when the hot wire is being touched. Thats all we need! Lets start MakeCode then!
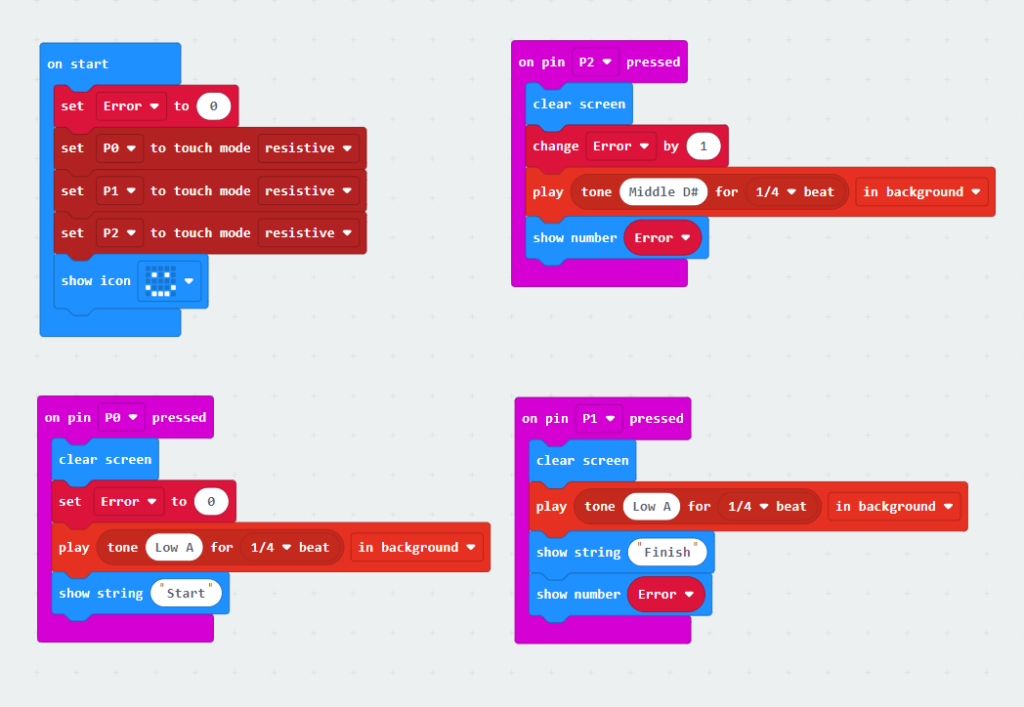
This is what I came up with: On start we set the variable “Error” to count all the “mistakes” we make while playing the Hot Wire game. All pins have to be set to resistive mode.
When touching the first pin (P0), we start the game. When touching the second pin (P1), the game will end, showing the final score. And finally, when touching the third pin (P2), the game will count and show the “mistakes” we made, meaning touching the hot wire.
To make the micro:bit register our resistive mode “touches”, we have to close a circuit. This can easily be done by connecting our stick, that has to be steered through our hot wire maze, to the attaches to the GND pin. This pin is our ground in order to complete a circuit.
If you want to have the program, you can download it HERE. Also it can be imported in MakeCode if you want to make some changes to it.
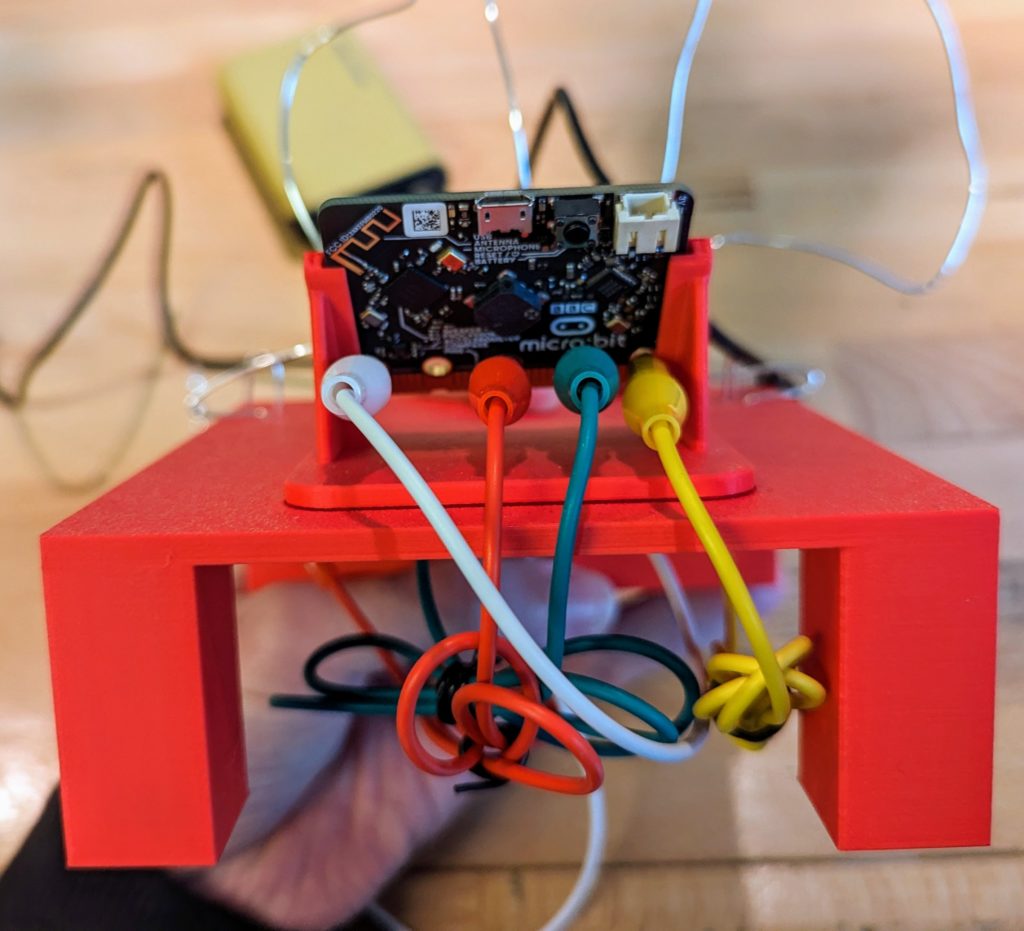
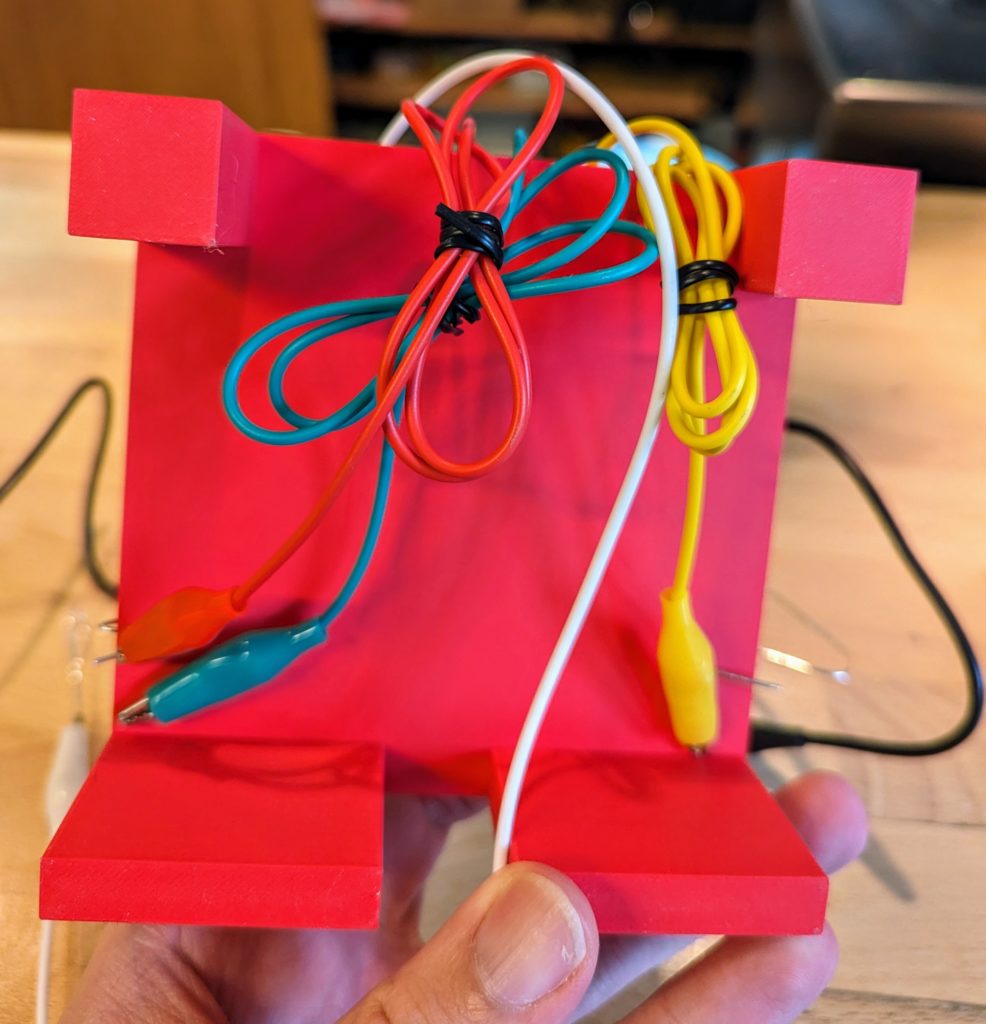
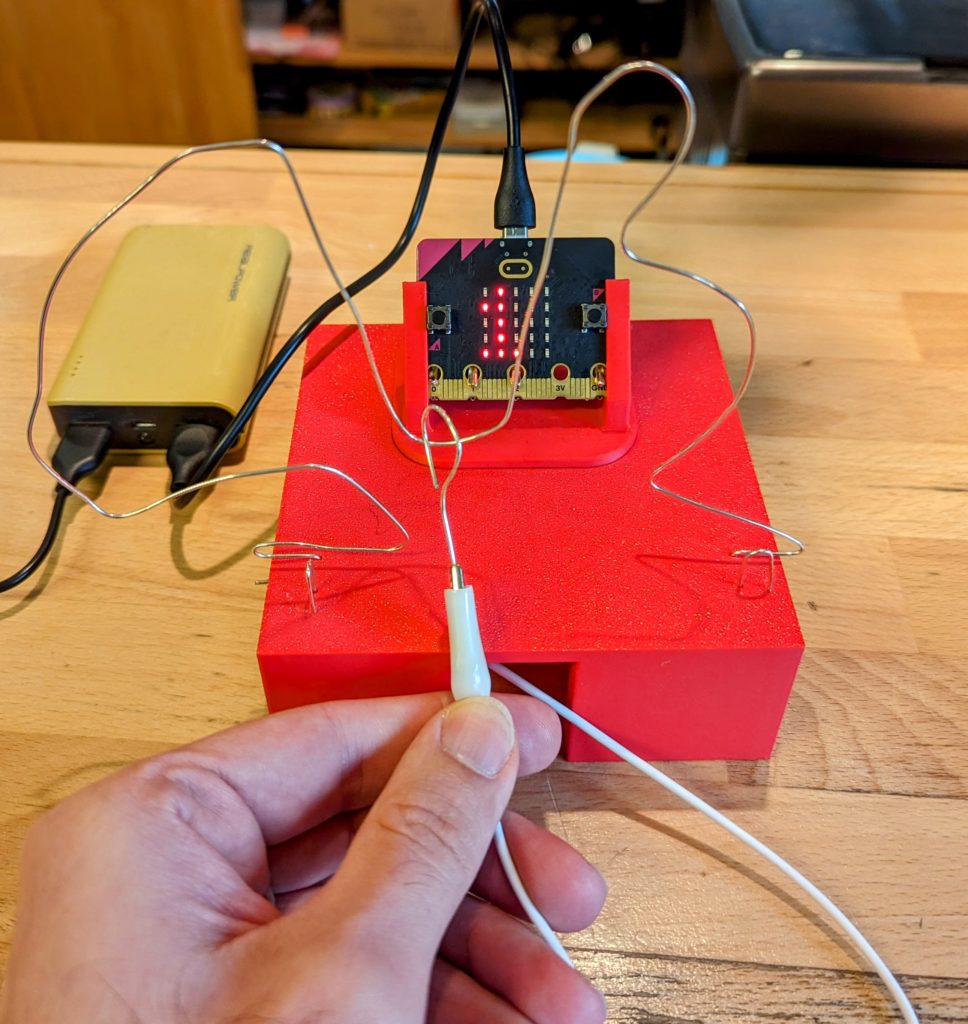
As you can see in the photos, I connected the white crocodile clamp to the GND pin and bent a round end made out of wire to be used as our handle for the game.
The yellow clamp connects to pin 0 and to a small piece of wire. When you touch this piece, the game resets and starts.
The green clamp connects to pin 1 and to another small piece of wire. When you touch this piece, the game ends and shows you the final score.
And finally the red clamp connects to pin 2 and to the long wire, which will be our game course. Every time the handle touches the wire, the circuit will be closed and the micro:bit will add +1 to the mistakes you made.
Easy but effective! And you will need a power source for your game. I decided to connect a powerbank to the Micro-USB input of the micro:bit. But be aware that depending on the powerbank it could switch itself off after some time because our game doesnt draw enough power to keep the powerbank active. But you can always put the USB cable into your phone charger, PC/Laptop USB port or you go for a battery pack.
If you want to rebuild this Hot Wire game for yourself, here is a list of what you will need:
- BBC micro:bit
- 3D printed game case
- 6x magnets (6x2mm)
- 4x crocodile clamps
- Metal wire
- Side cutter for wire pieces
- Pliers to bend the wire
- Access to MakeCode or pre-written program
- Power source (USB to Micro-USB cable + powerbank/charger or battery pack)
Enjoy building and tinkering! And most of all: Enjoy gaming! 🙂

