Almost every week there is something new to 3D print and to work on I never would have thought about before.
This time it was a theatrical mask for the theatre play “Frankenstein – oder der moderne Prometheus” by the theater collective zeit für Kollektiv.
It is their first own production and apparently.. they needed a mask! Ricarda Clahsen, one of the theatre artists, reached out to me and asked if I would be up for the task. For sure I was, because the 3D printing design by trptyk was just a pleasure to work with!
I needed to rescale the design so the mask would fit the actor.
The next step was to cut the 3D design into four pieces, so they would fit on the print beds of my Bambu Labs P1S 3D printers.
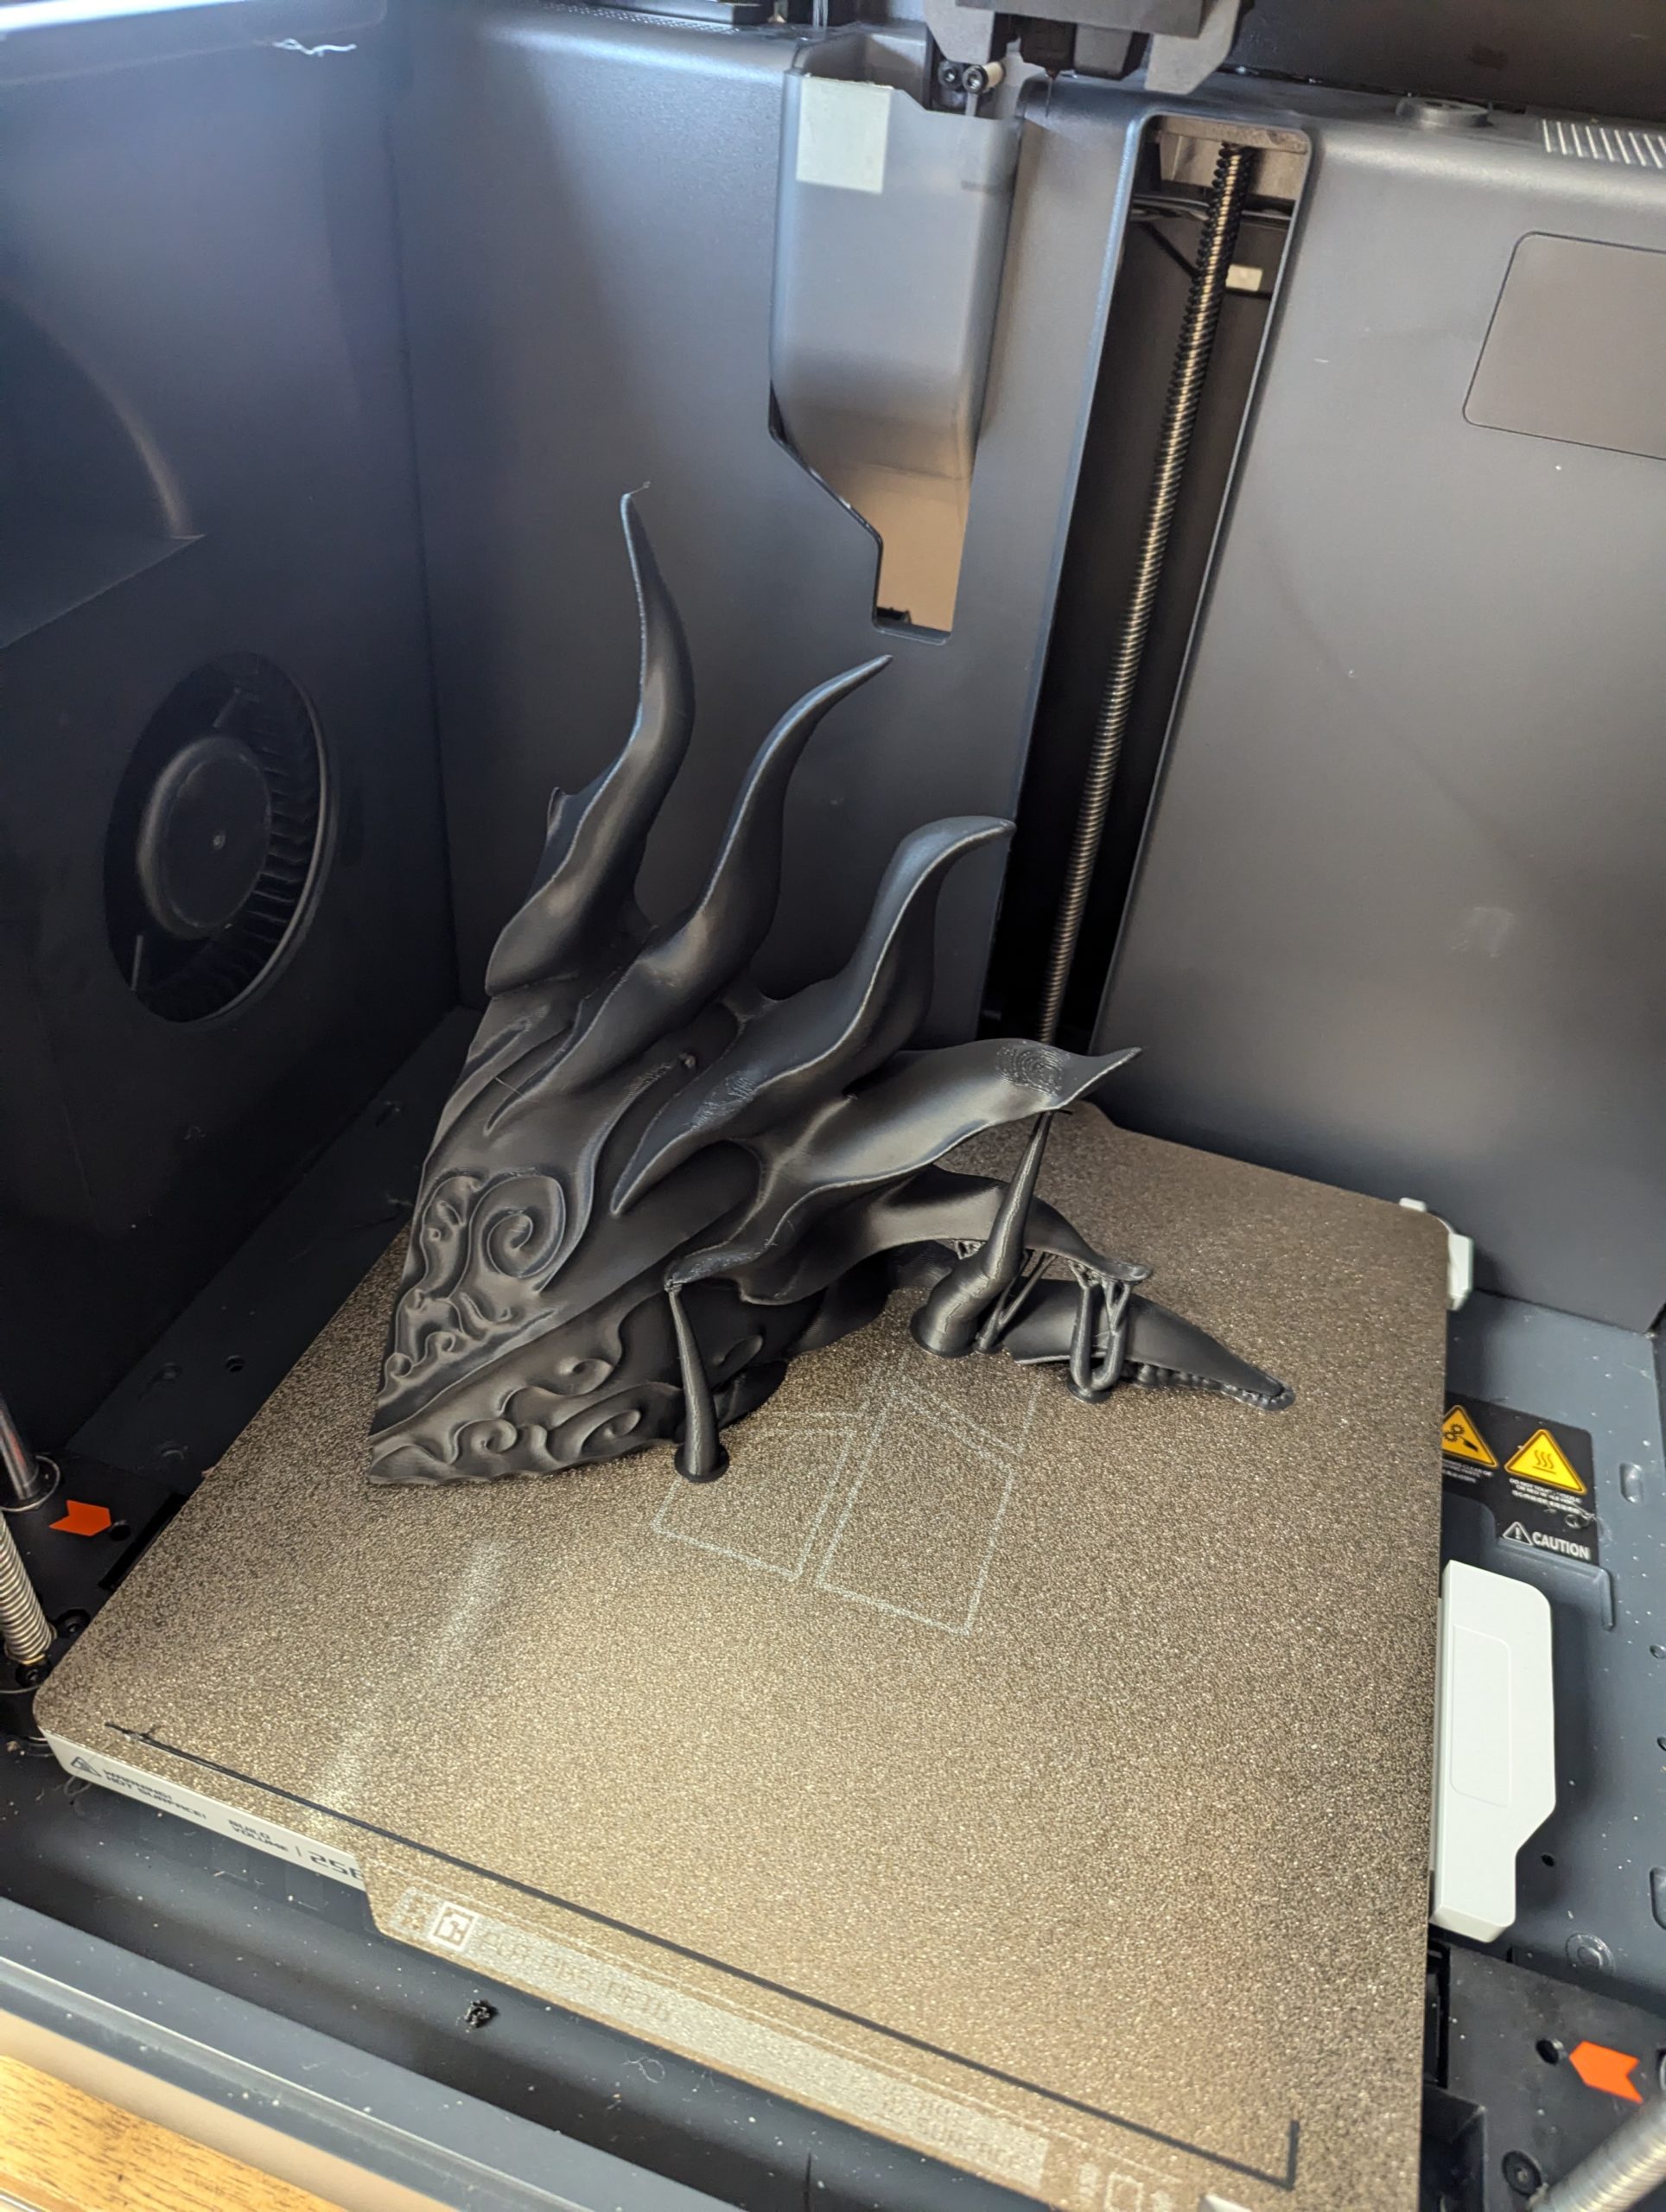
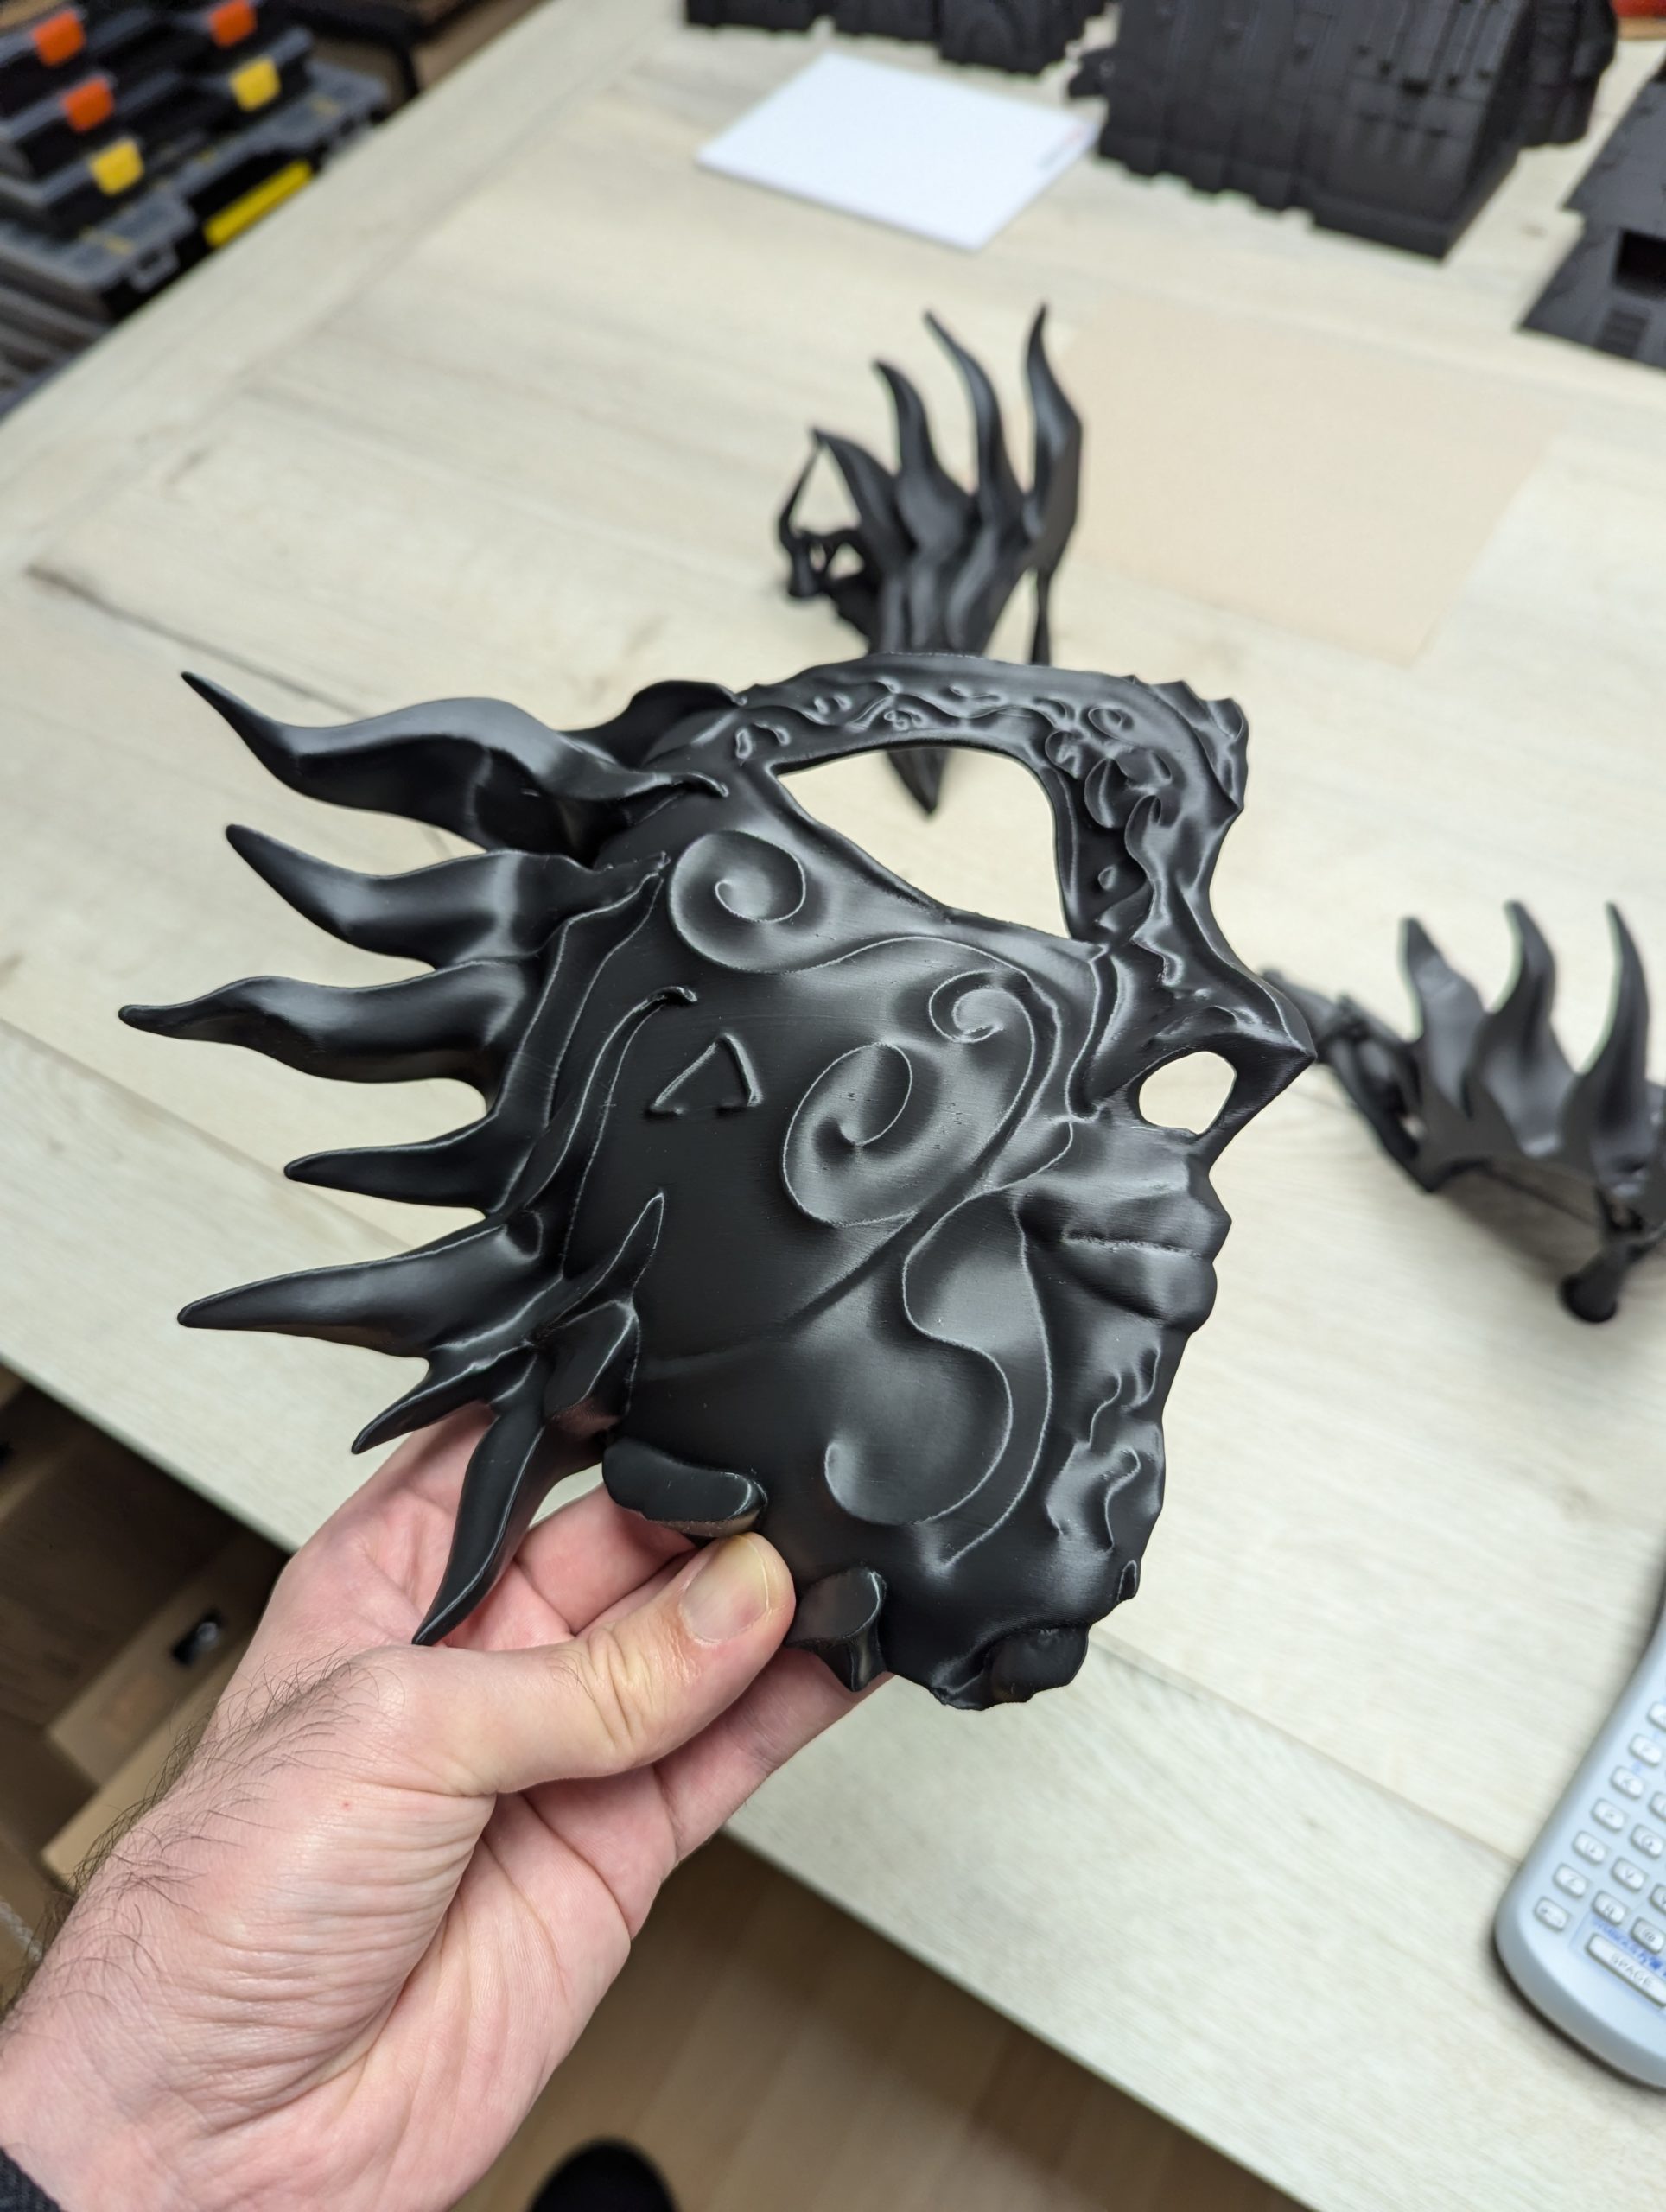
Nice quality print at 0.12mm layer height! We just have to pin and glue the four pieces together and see how it looks like at this stage.
The step I forgot to take photos of was sealing the four pieces from inside the mask by “welding” them together. This was done with a 3D printing pen. Just redrawing all the connecting gaps with a line, using the same filament I used for printing. The molten filament “fused” all the pieces together – together with the pins connecting the pieces and the super glue makes a strong connection to hold everything together.
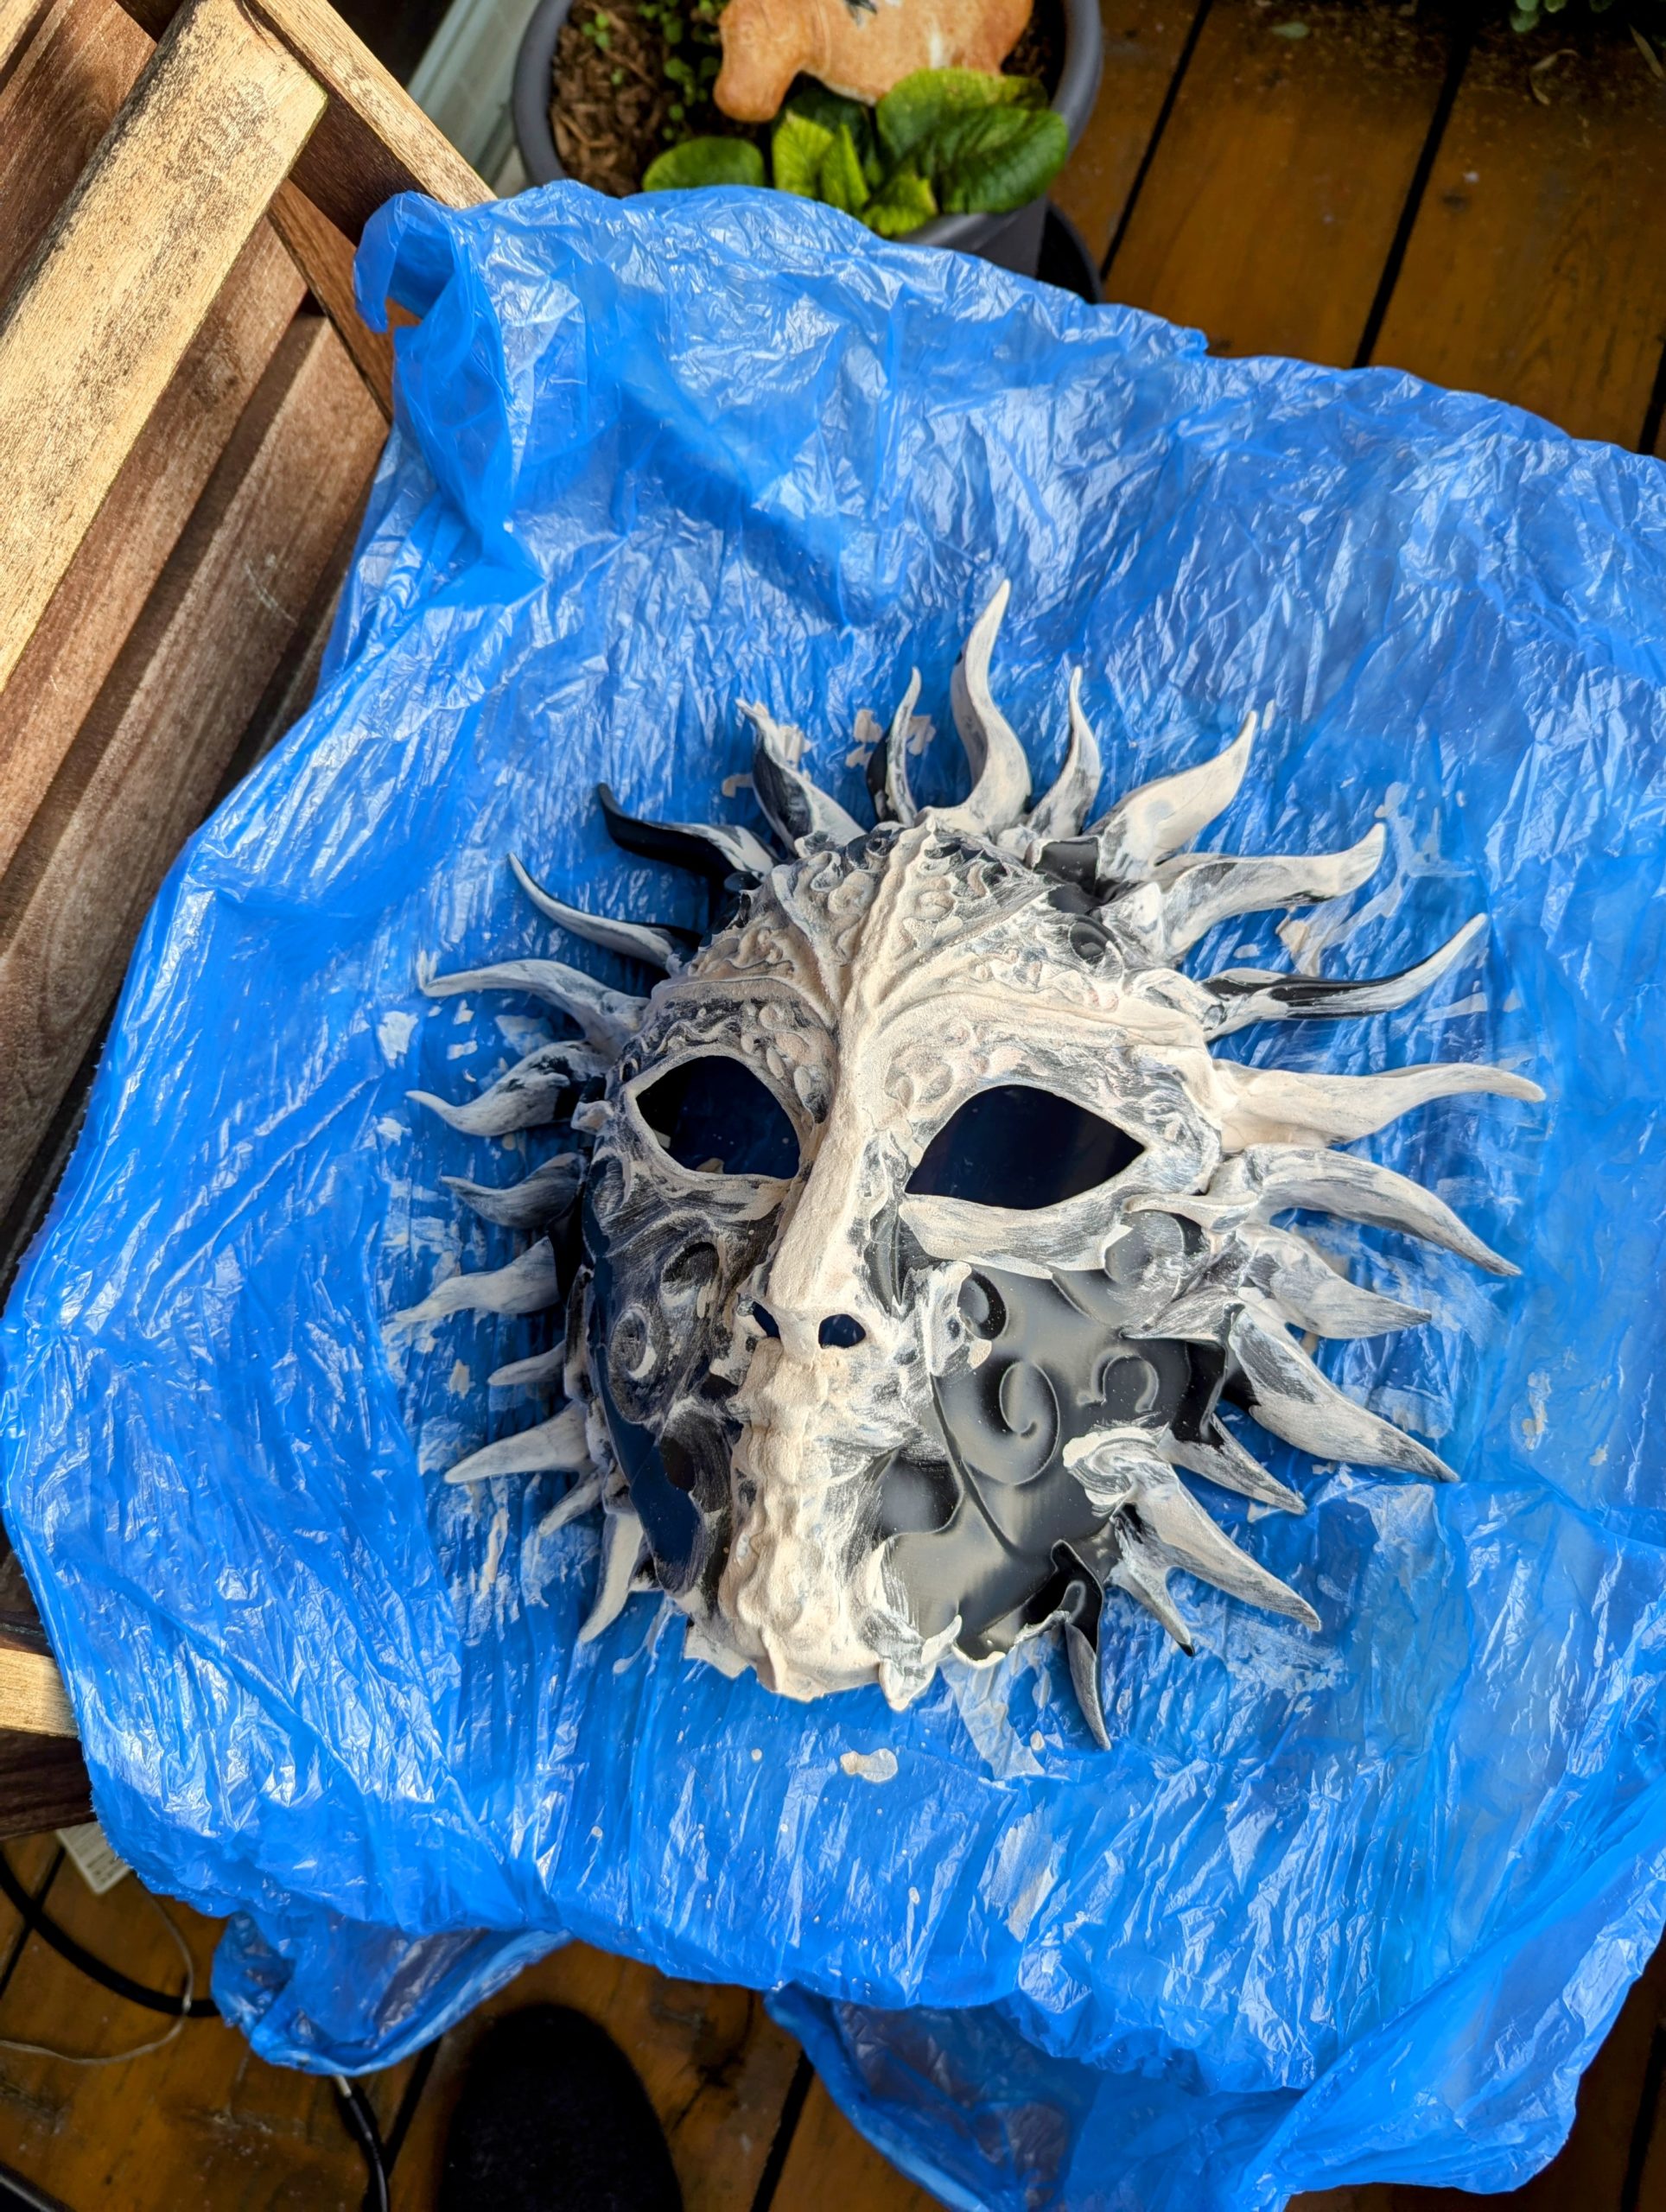
The four pieces had some tiny gaps between them, also we had some ugly looking surfaces from the contact points of the tree support structures. I applied a mixture of wood filler and acetone over the critical areas. I used the acetone mix to make the viscous wood filler float better into the gaps. Also it evaporates and leaves the filler for drying.
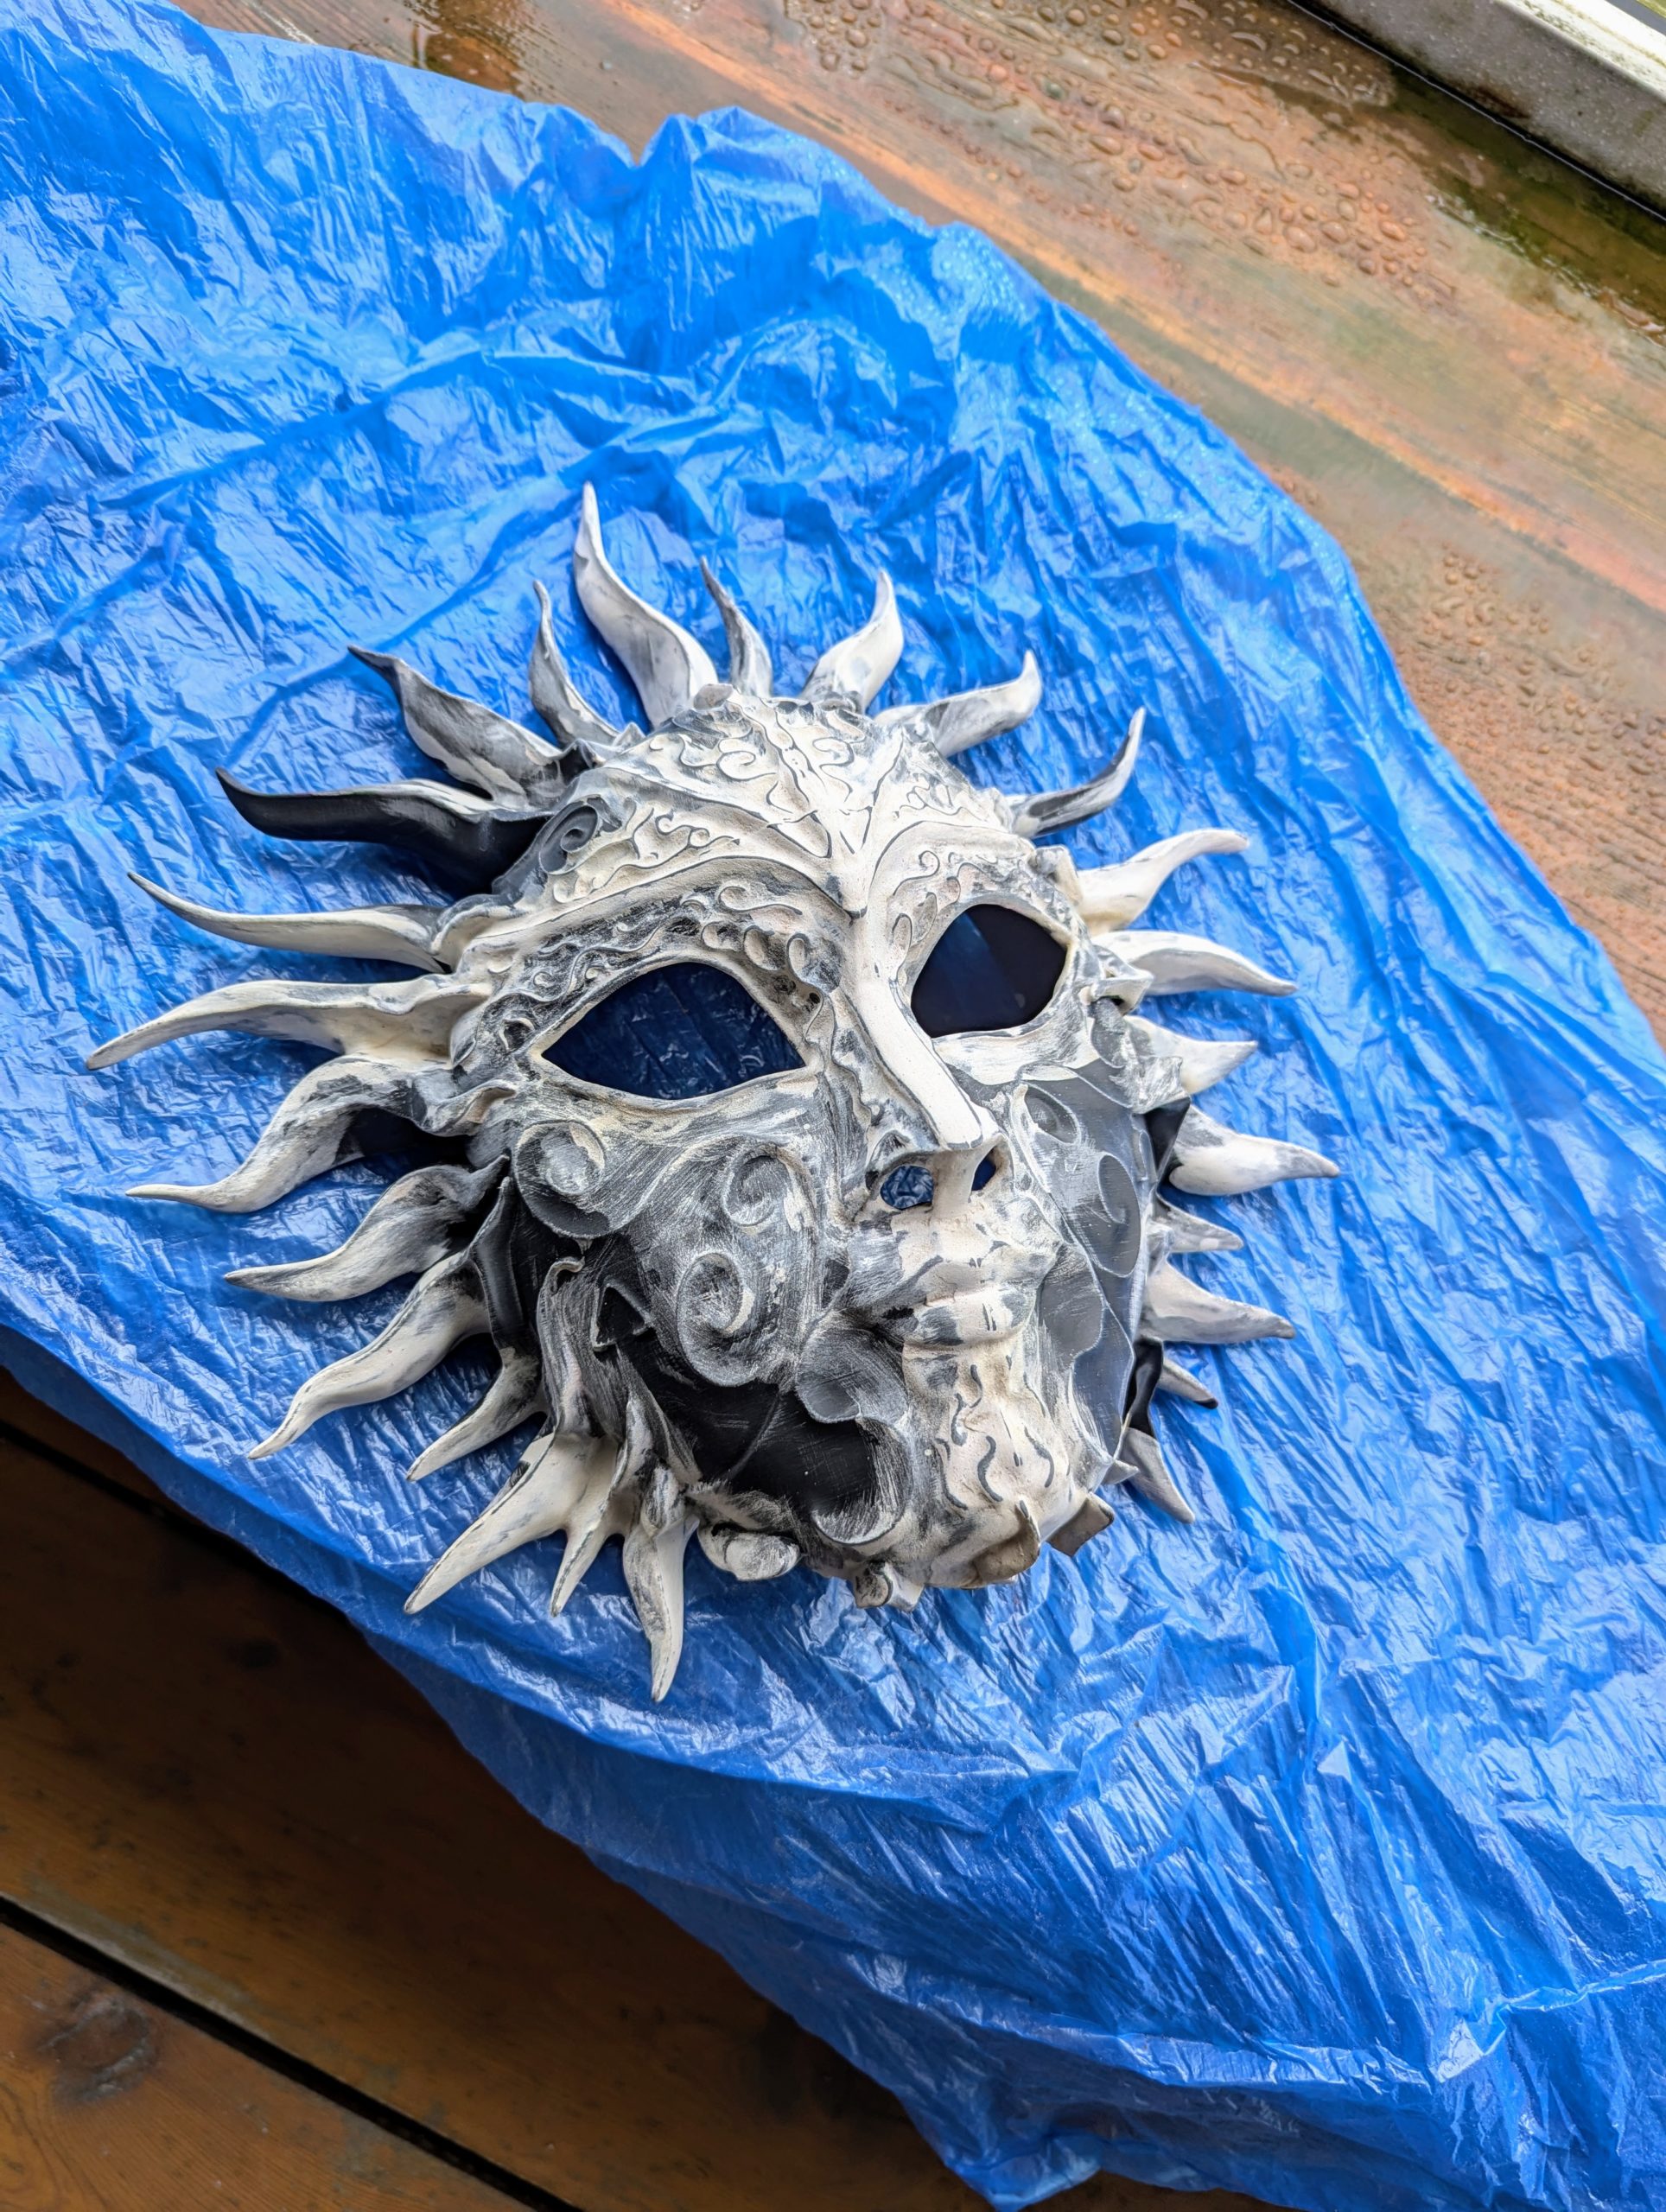
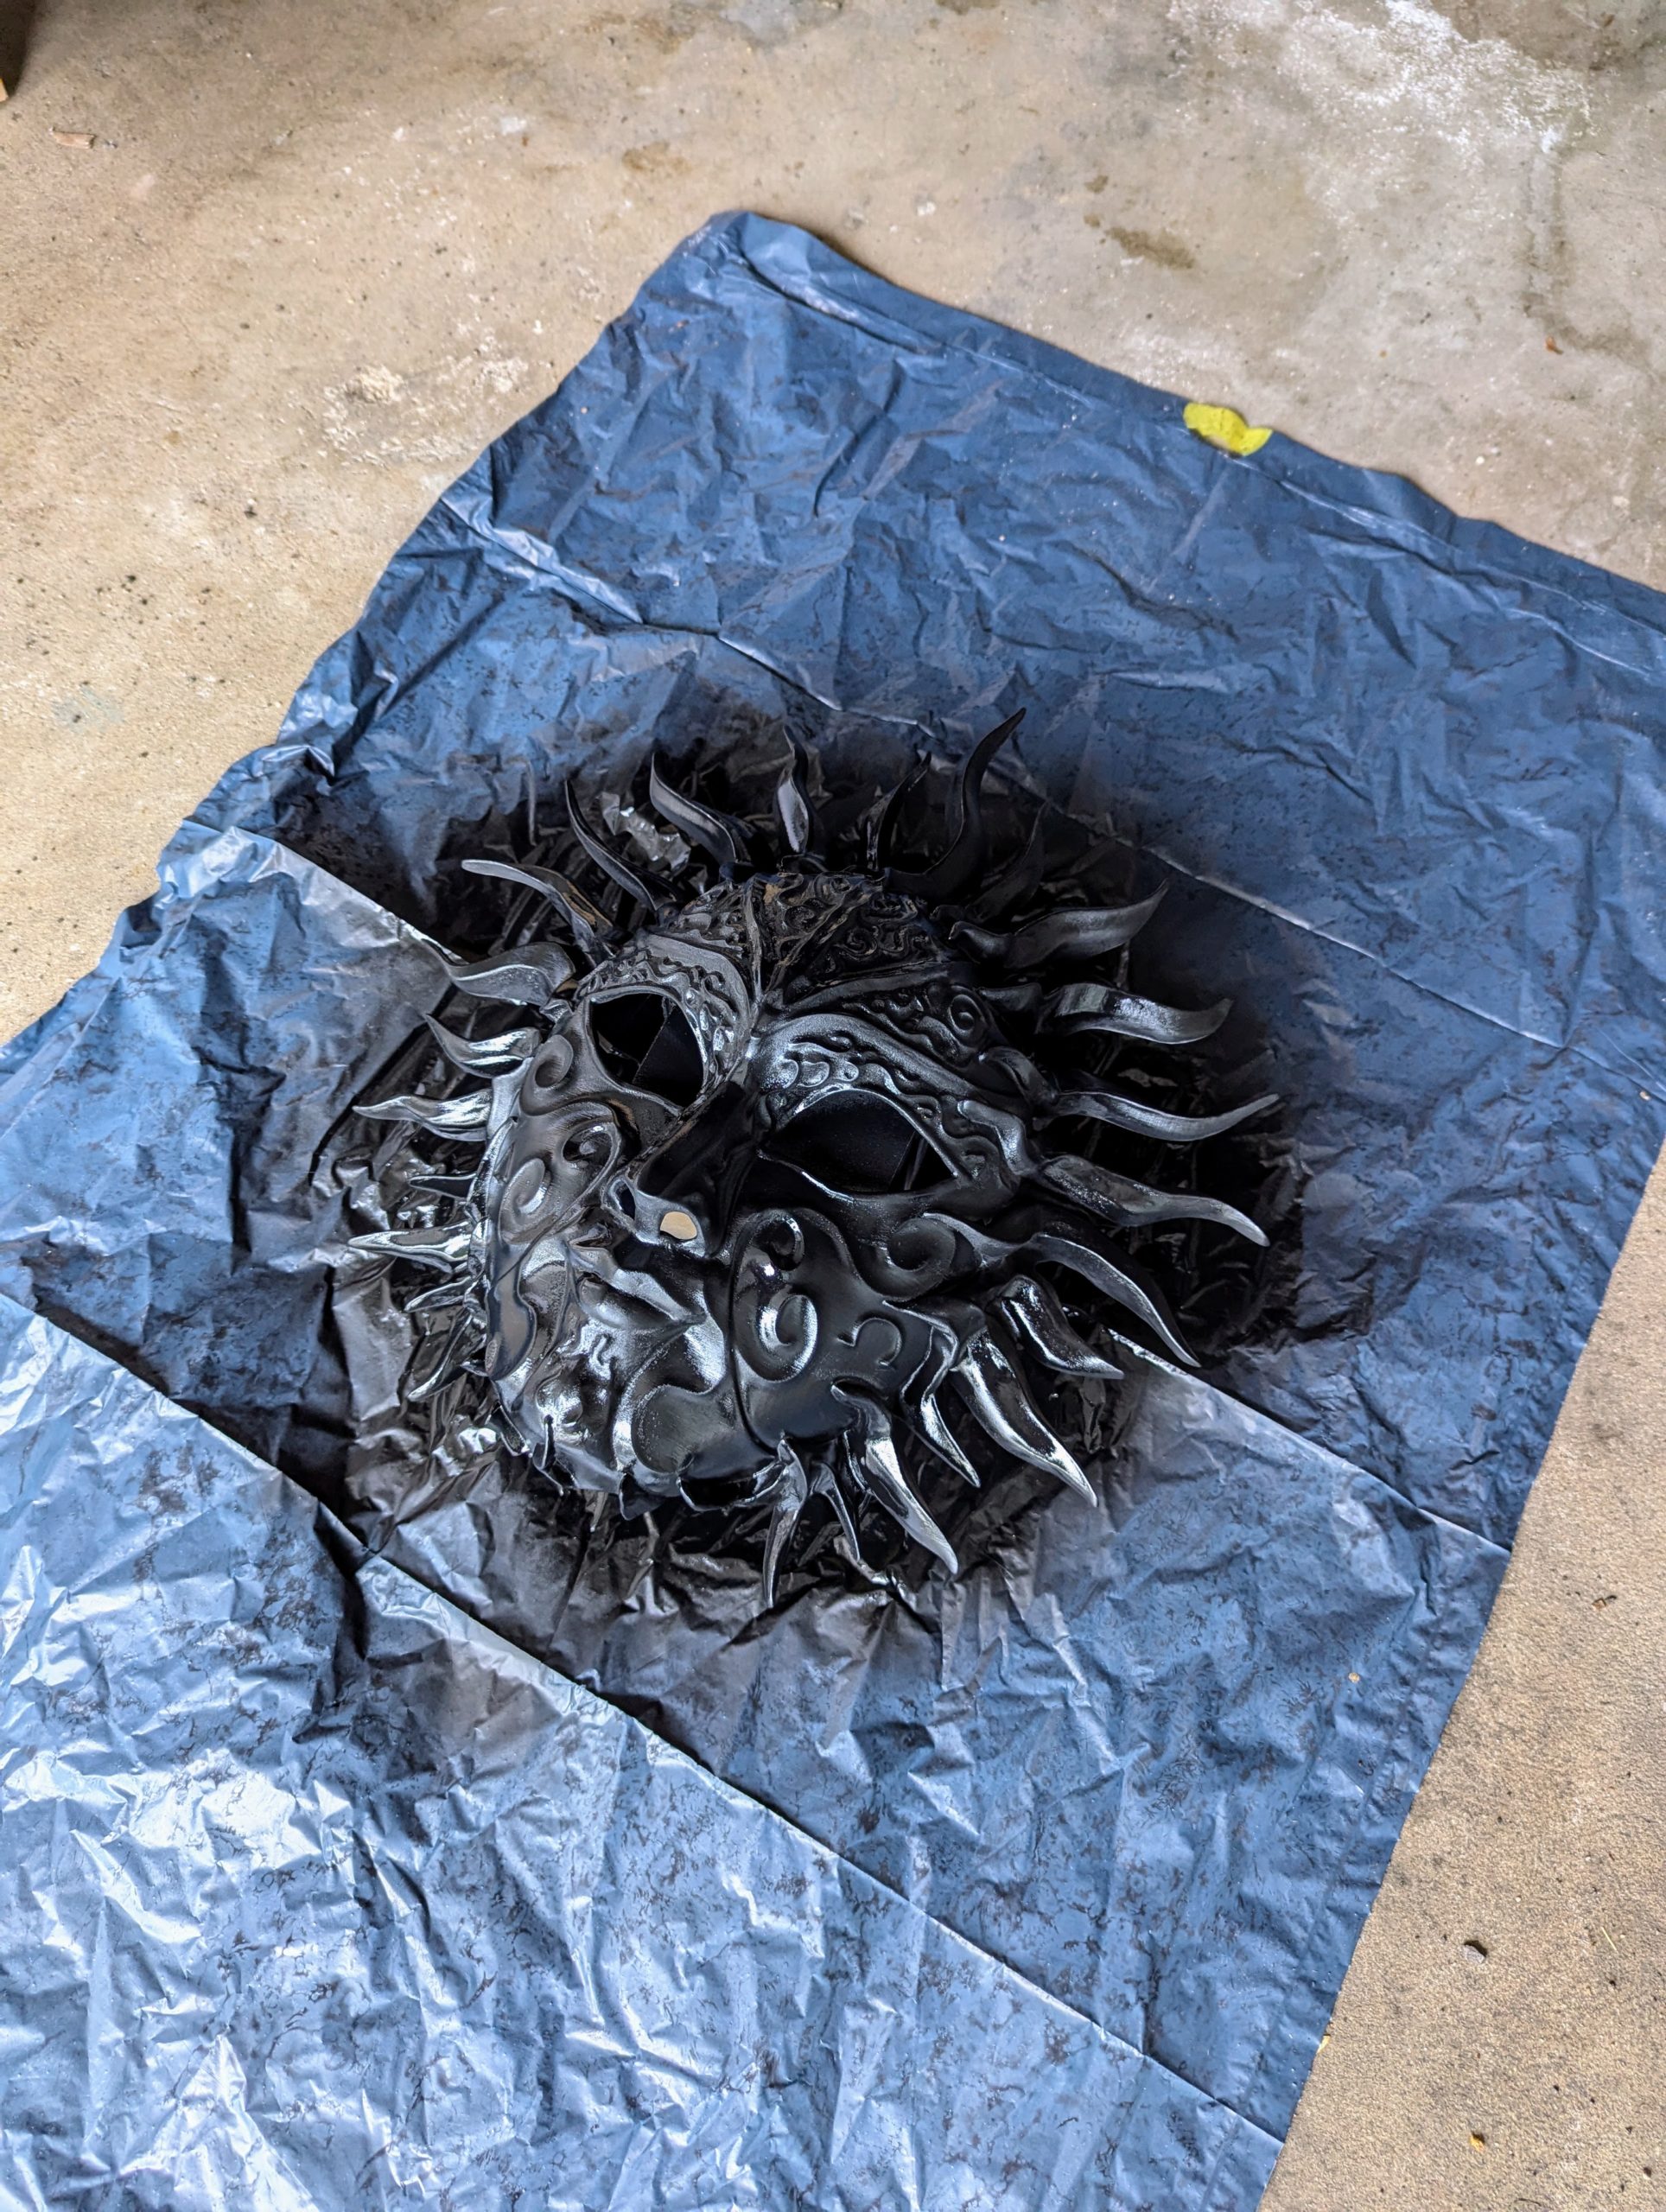
After letting the mask dry I sanded down those areas to make them more smooth. Then it was time for a first black basecoat. And letting it dry again.
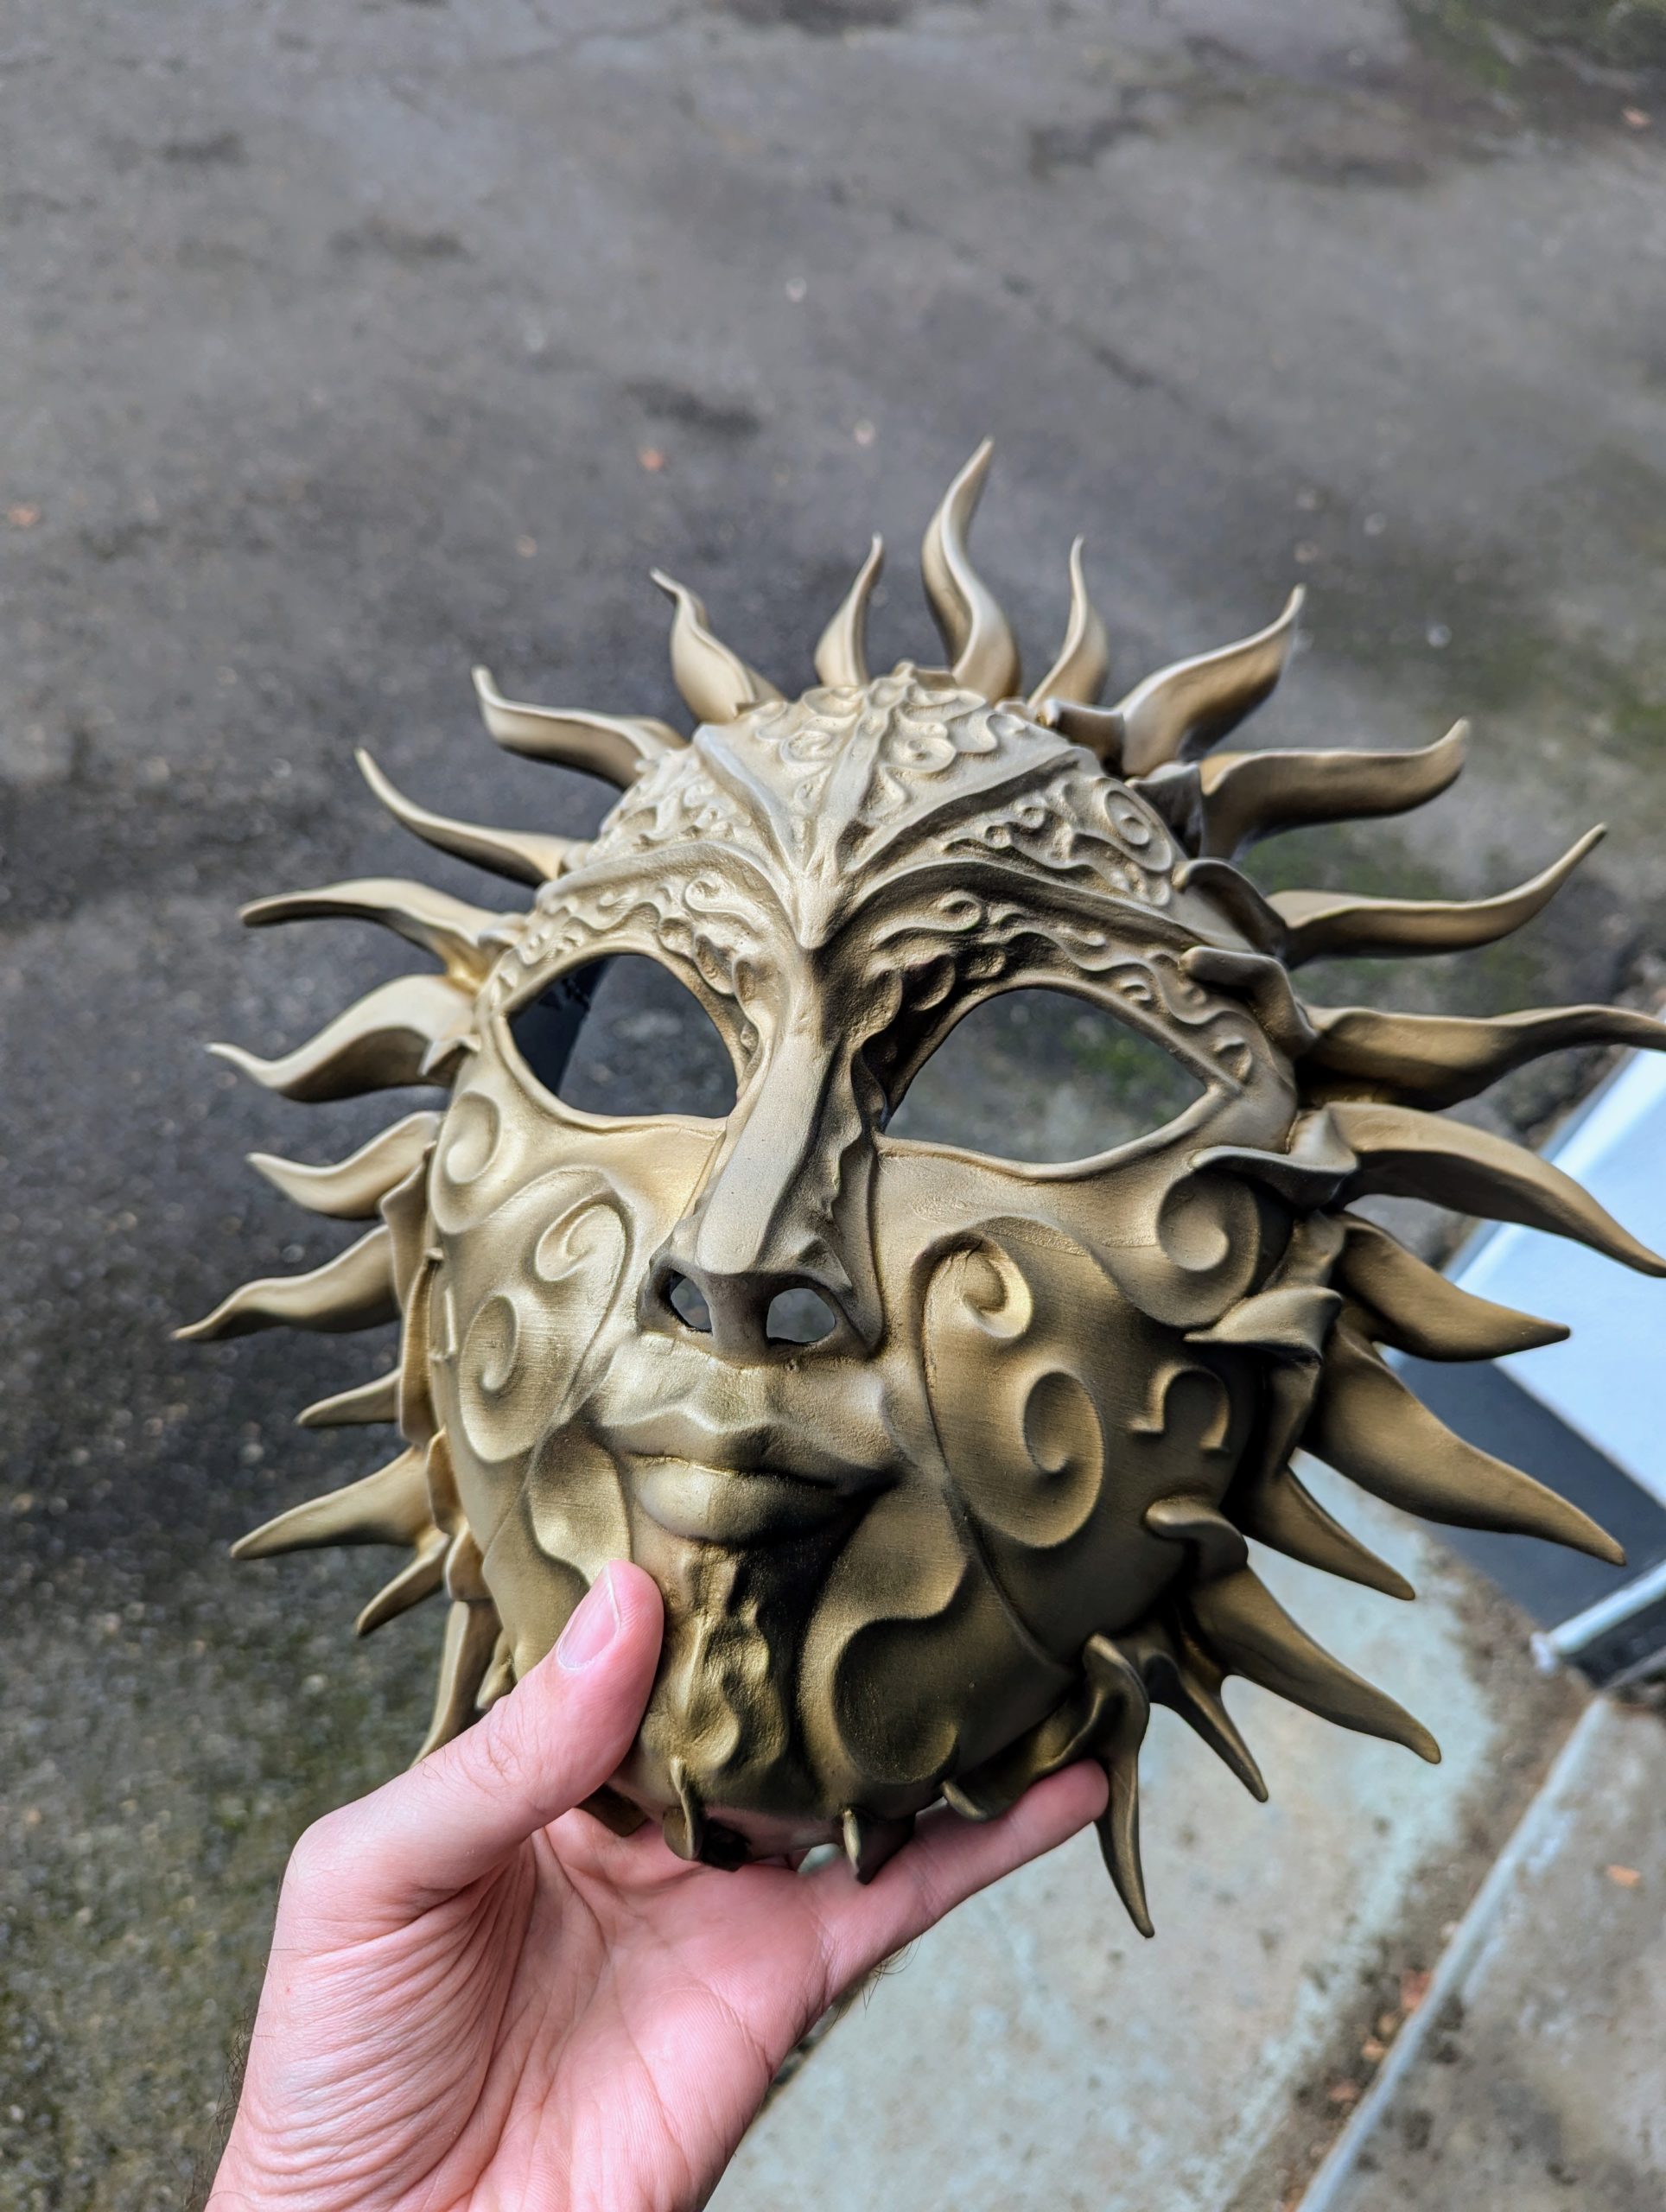
Then I applied a first golden basecoat and let it dry again. So much drying and waiting time!
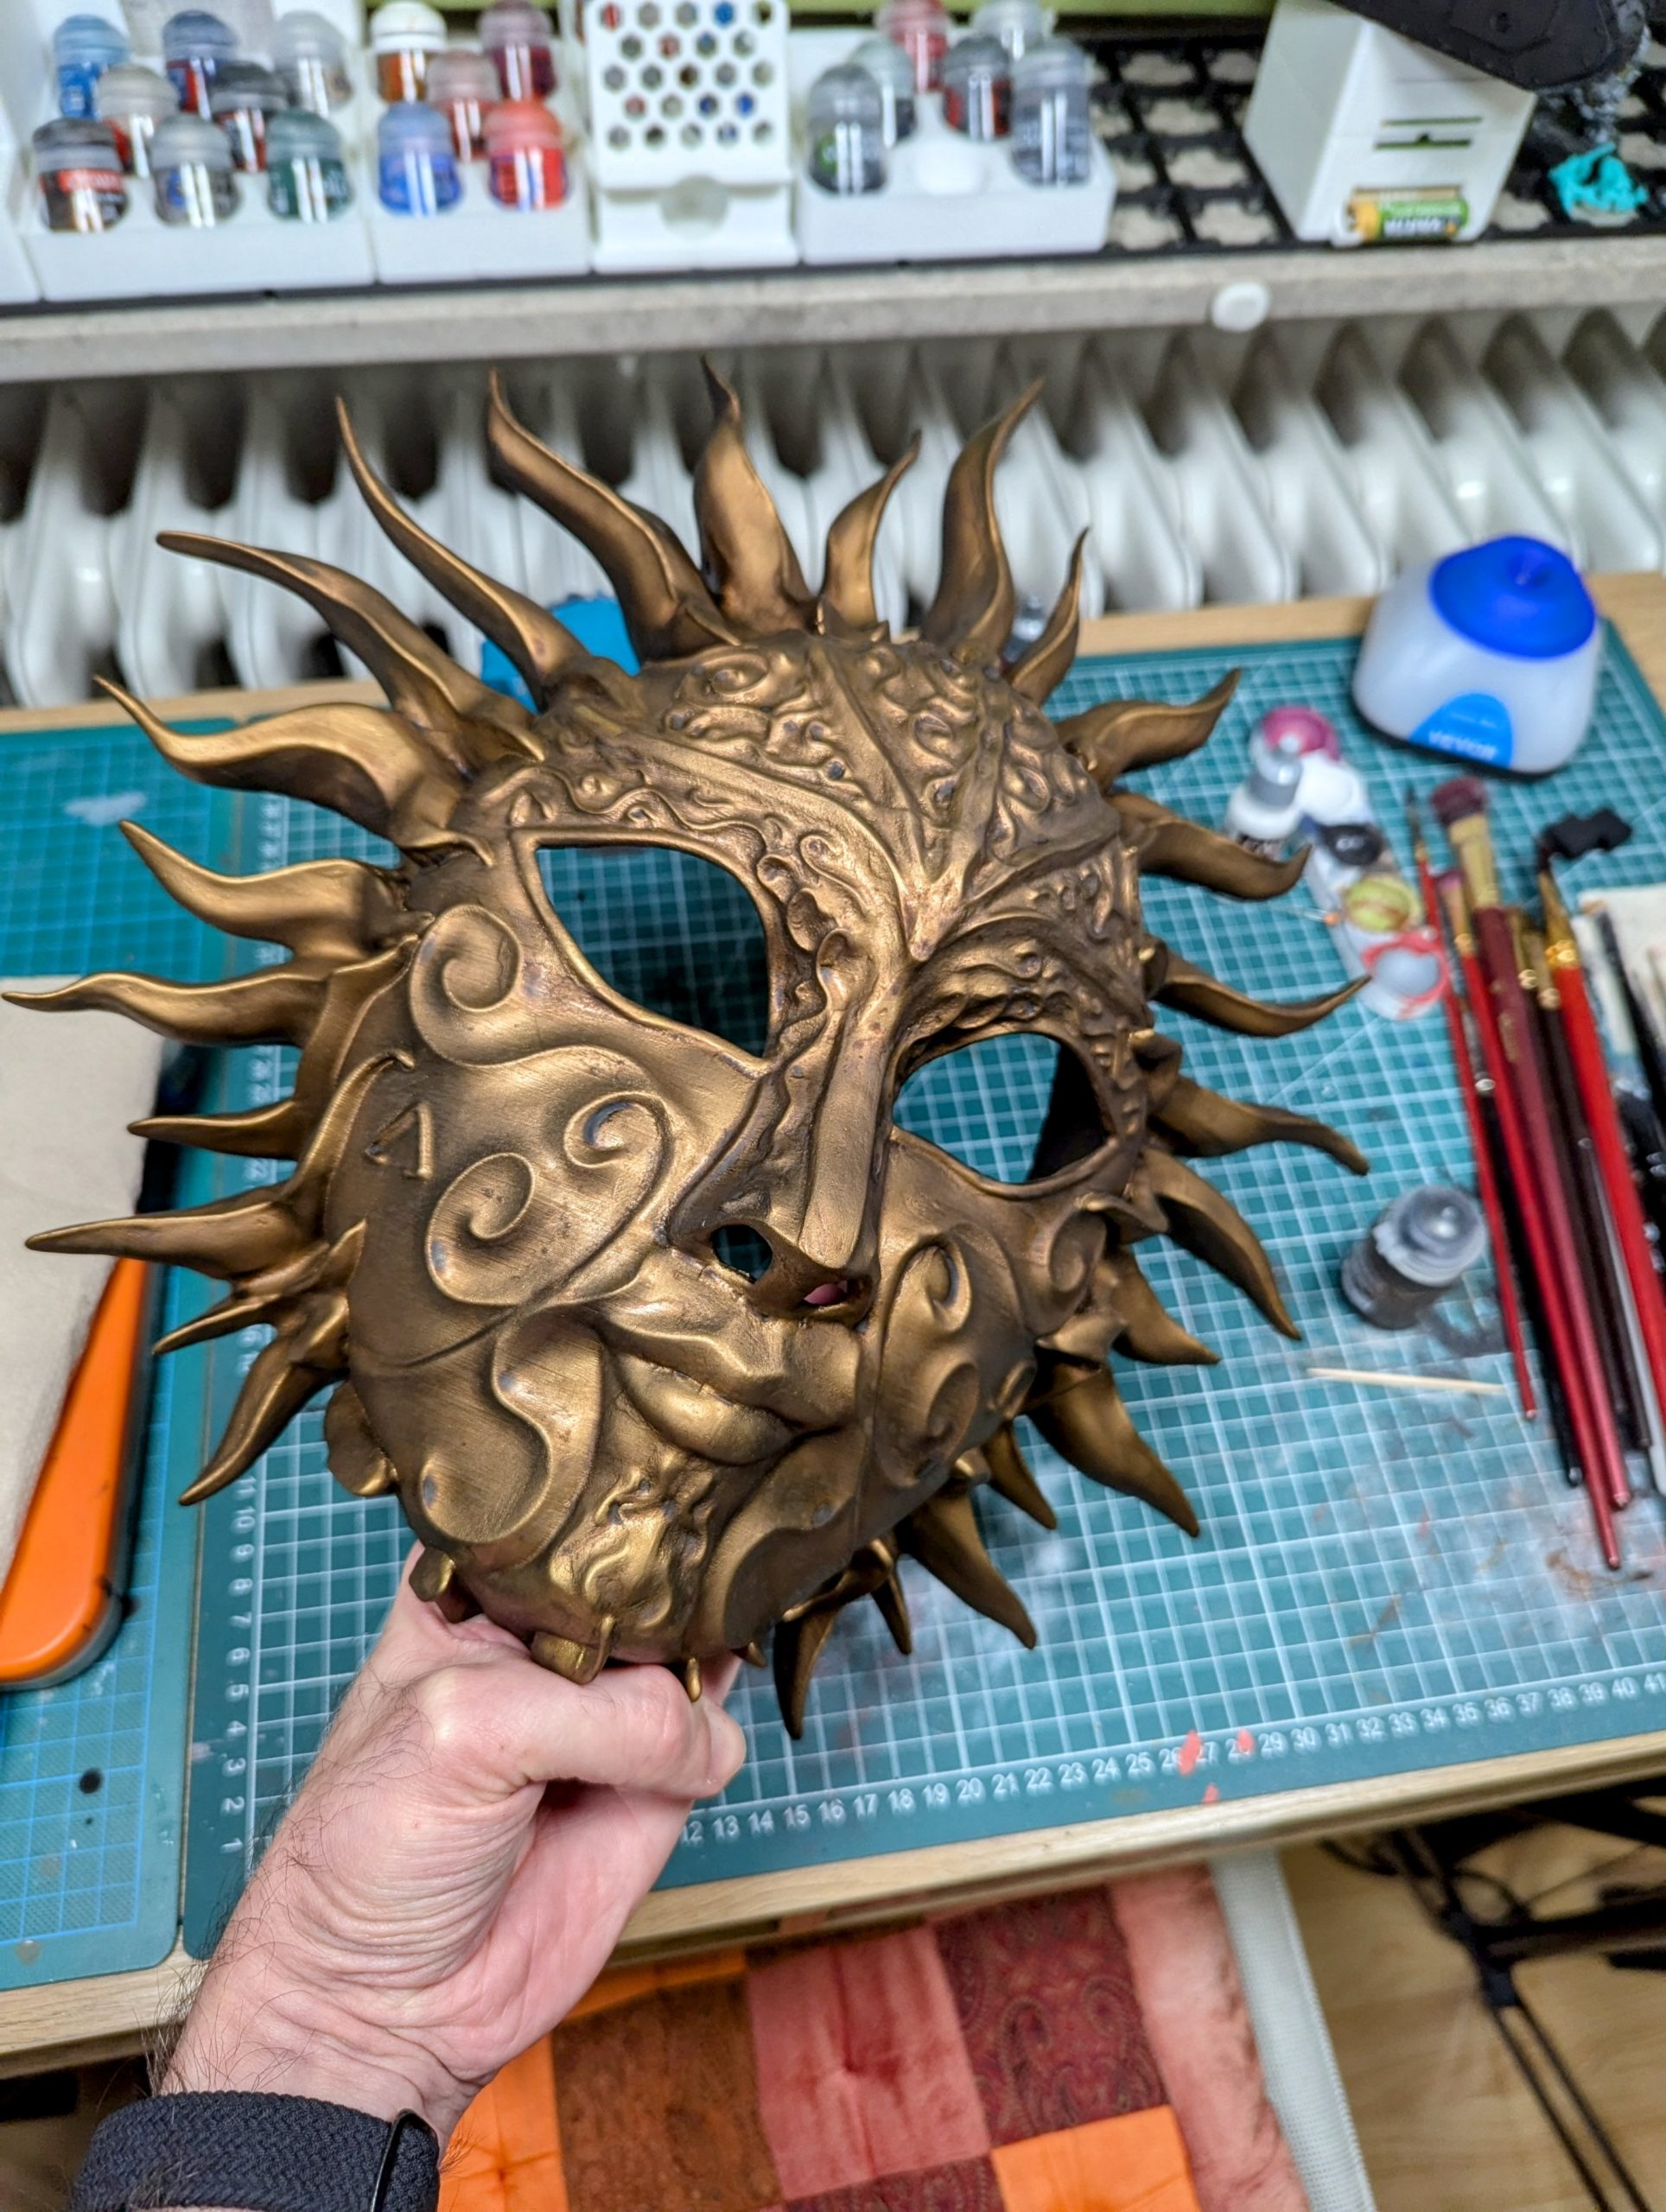
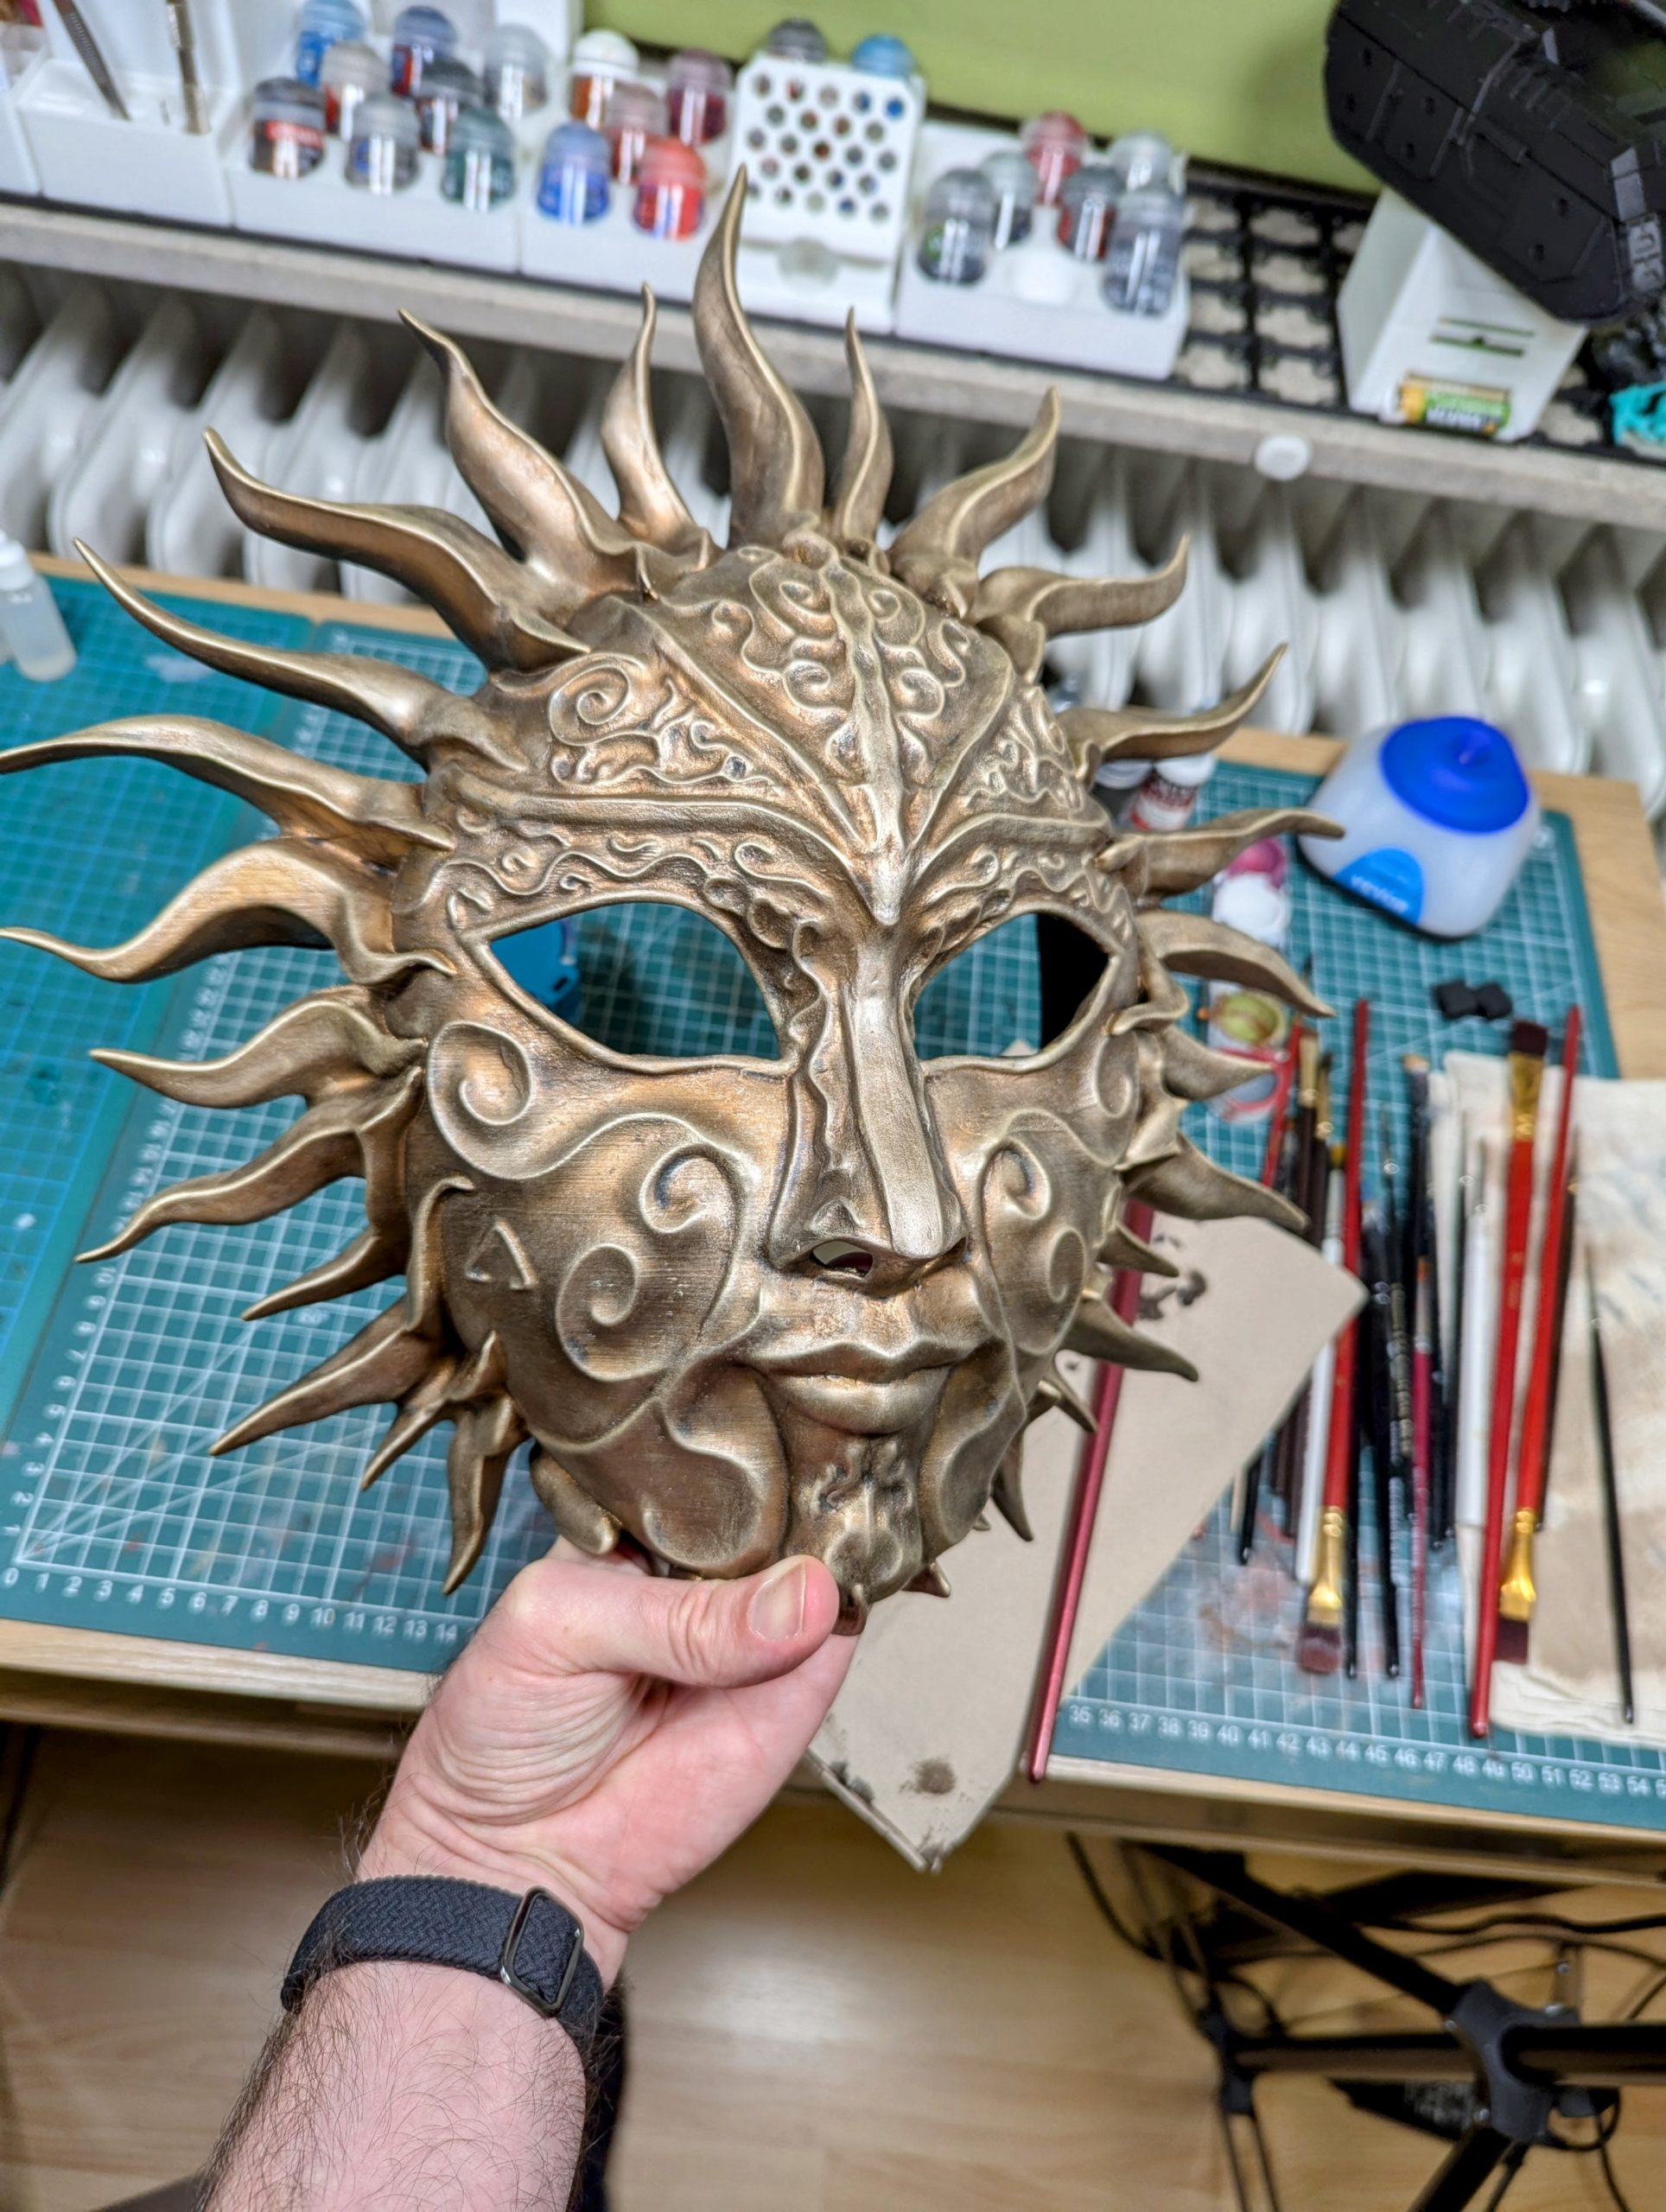
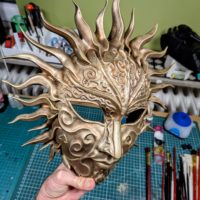
In the first photo above you can see that I applied some ink / shade all over the mask to give the surface more structure and shadow. In the second photo above you can see them popping really nicely after applying a first rough drybrush with a more bright colour of gold.
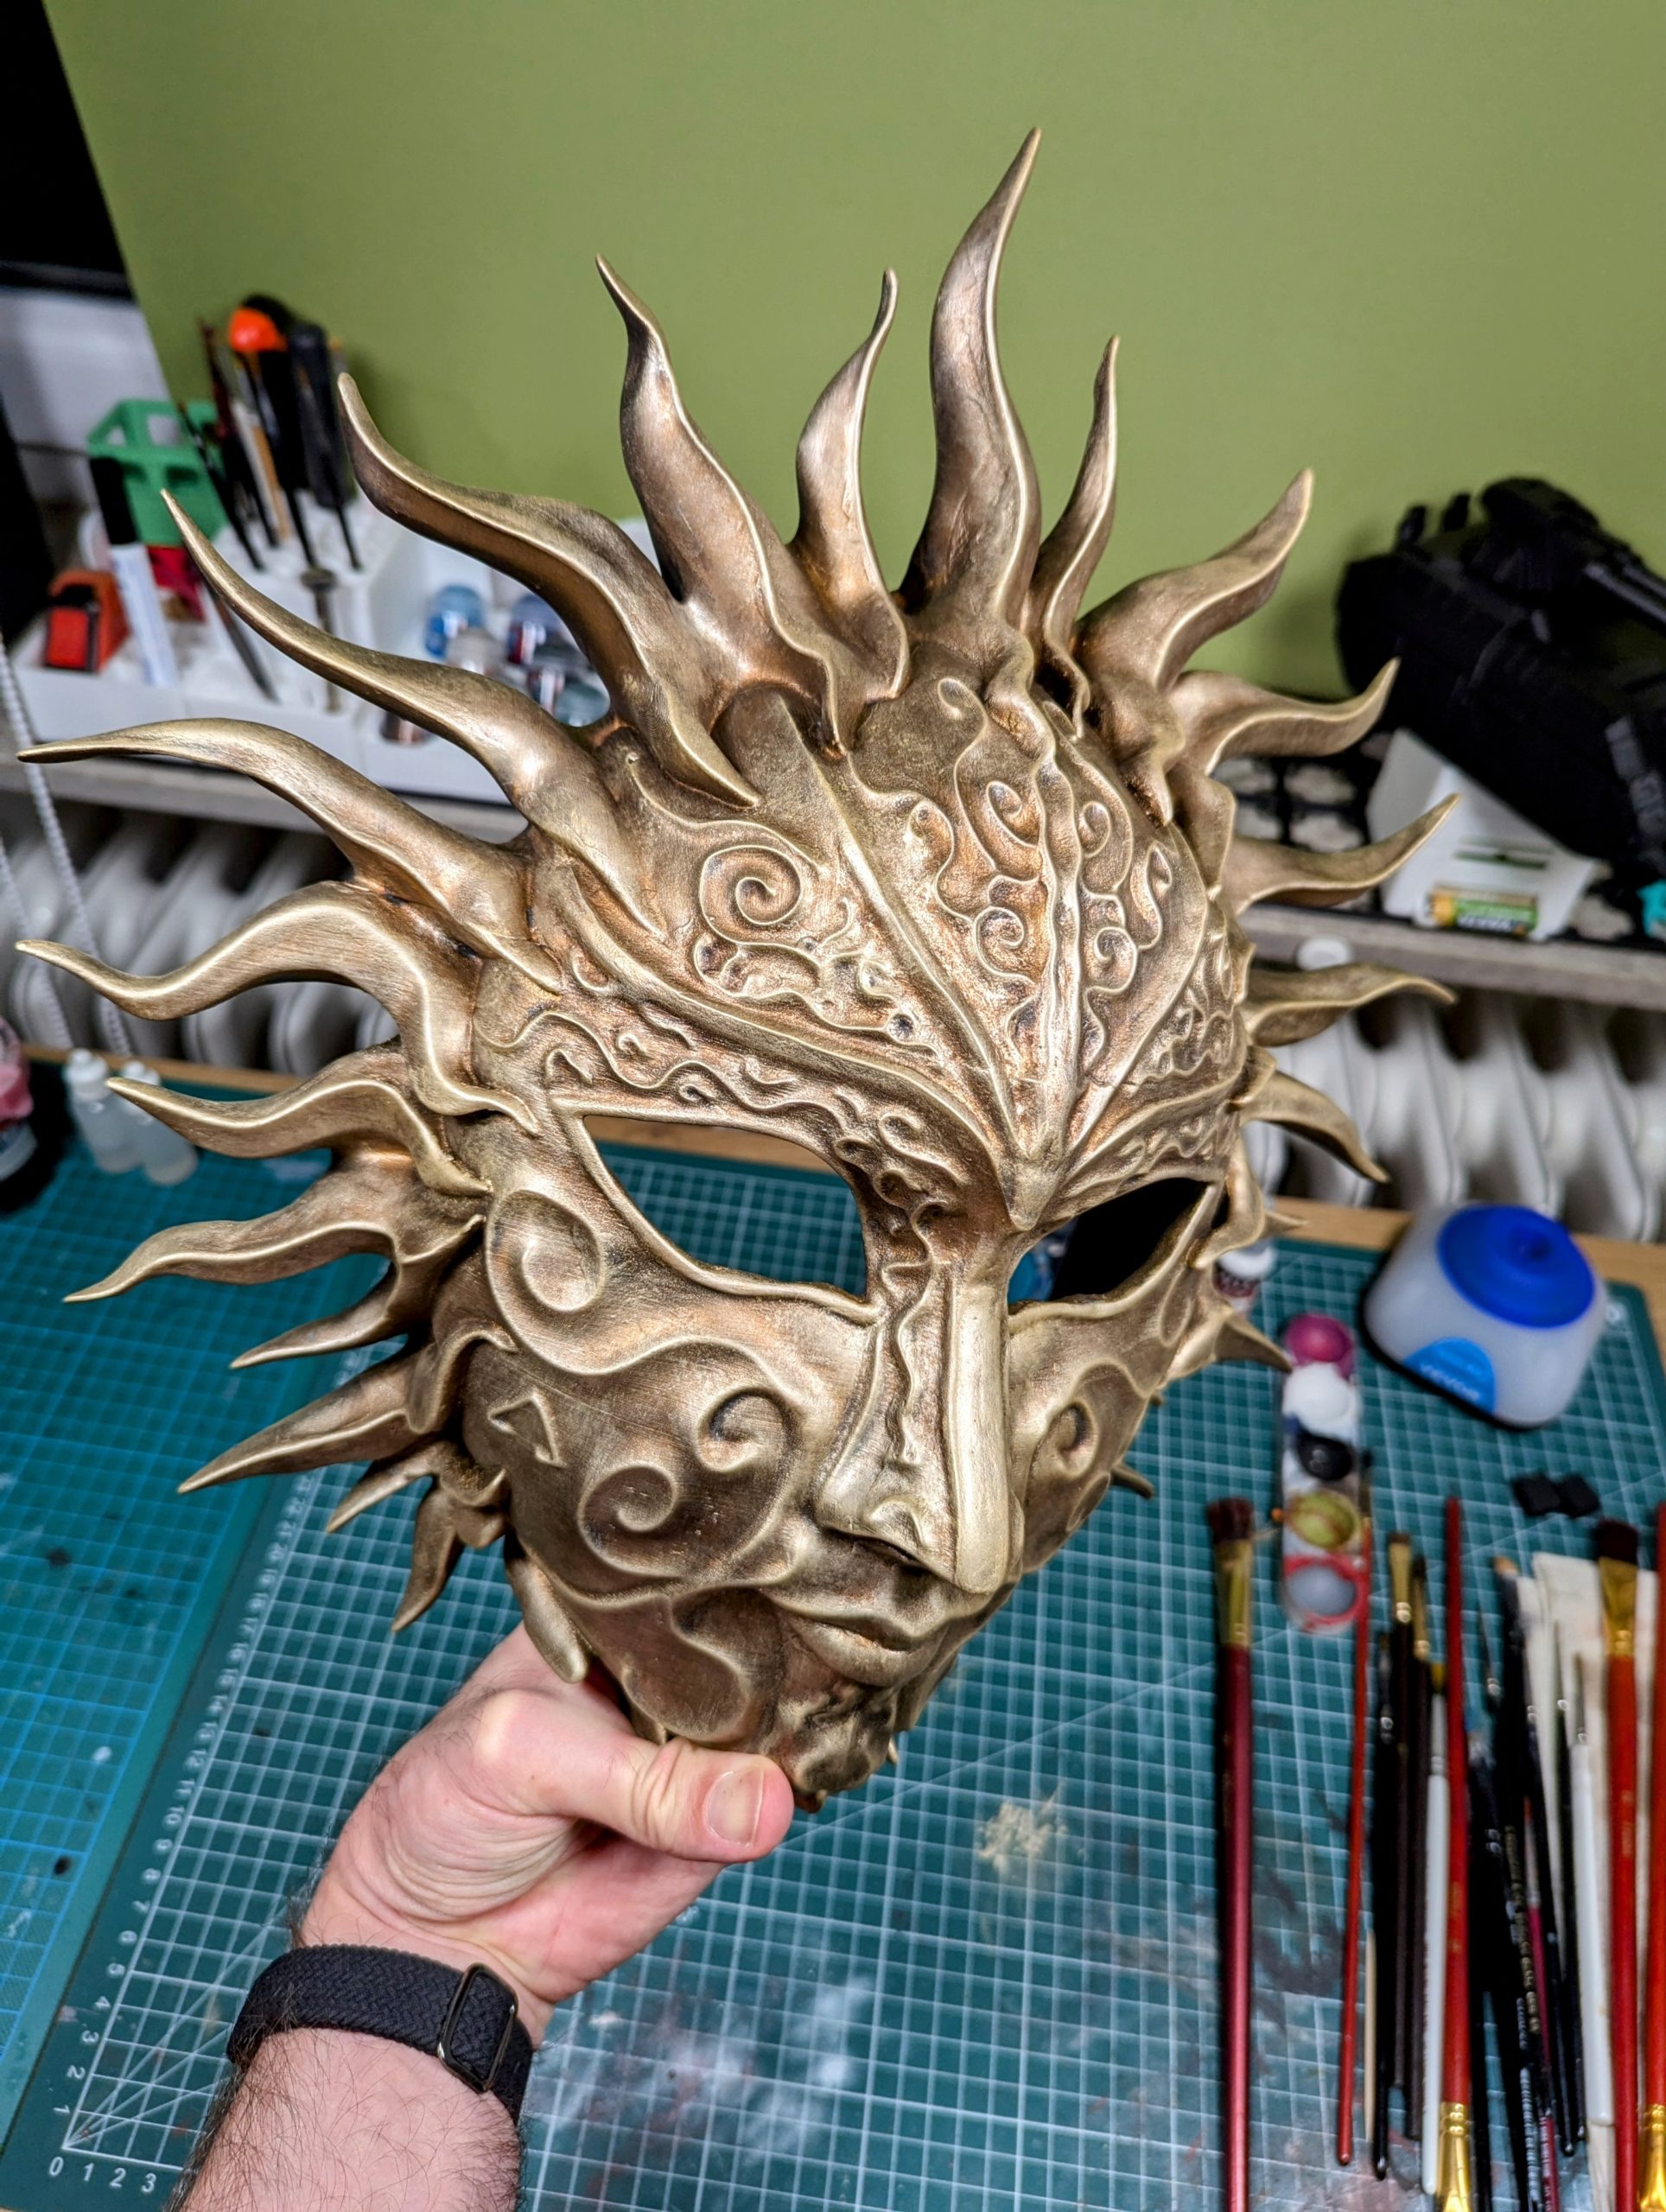
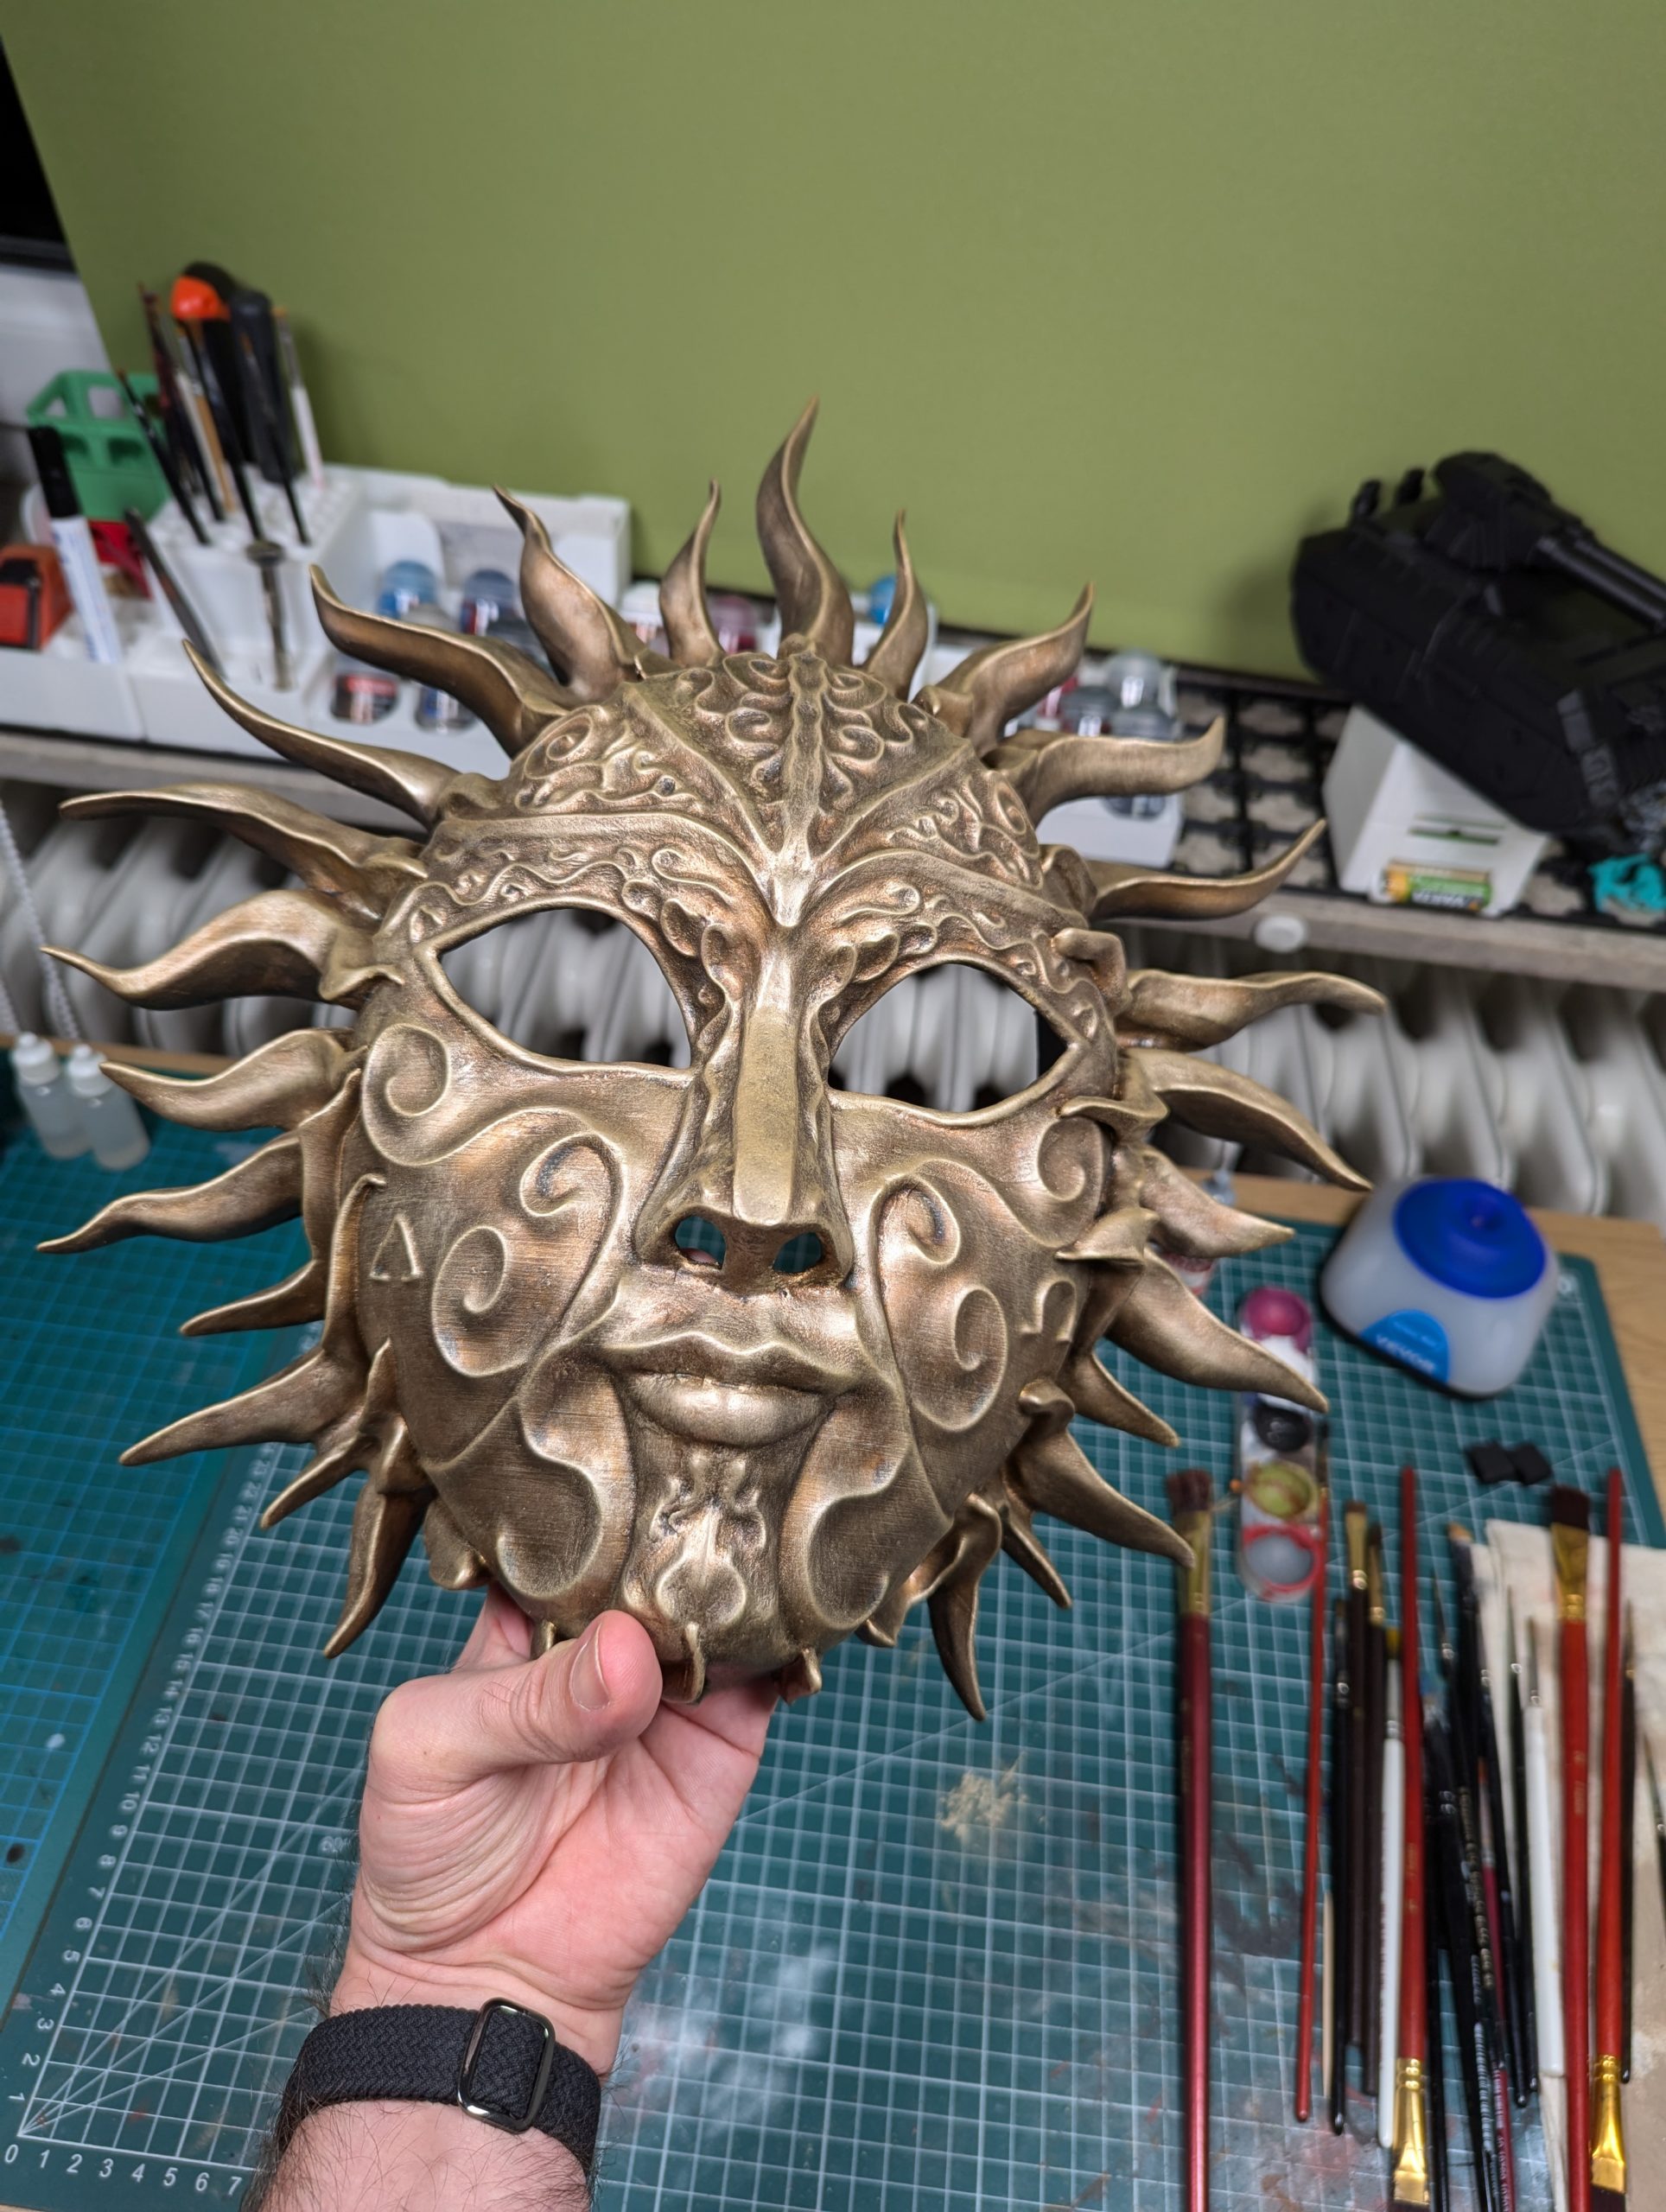
And there are the final shots after I was finished and happy with my drybrush layers. I think from a theatre play distance the mask is just perfect for its purpose. I cant wait to see it in action!
Feel free to contact me if you have any questions about the used materials or if you have an inquiry of your own. 🙂
Happy (theatre) playing! 😉